
Speed Ramp with Motion Blur in DaVinci Resolve
Speed ramping—transitioning from fast to slow motion within a single clip—is a staple of cinematic editing. However, achieving a smooth result that retains natural motion blur during the fast sections can be tricky. In DaVinci Resolve 20, there is a new keyframe tray that makes easing your ramps significantly easier. But to truly take your edit to the next level, you need to reintroduce motion blur to the sped-up sections without rendering files externally. Here is a step-by-step guide to smooth speed ramping and adding vector motion blur in DaVinci Resolve 20.
Do the Math: Finding Your Max Slow Motion
Before you start ramping, you need to know how slow you can go before you start duplicating frames. This depends on your footage frame rate versus your timeline frame rate.
Check your footage: Select your clip and check the File tab in the Inspector to see the frame rate (e.g., 30 fps).
Check your timeline: Many cinematic projects run at 23.976 (24) fps.
Calculate the limit: Divide the timeline rate by the clip rate. For example, 24 divided by 30 is 0.8. This means you can slow the clip down to 80% and still see every original frame without stuttering.
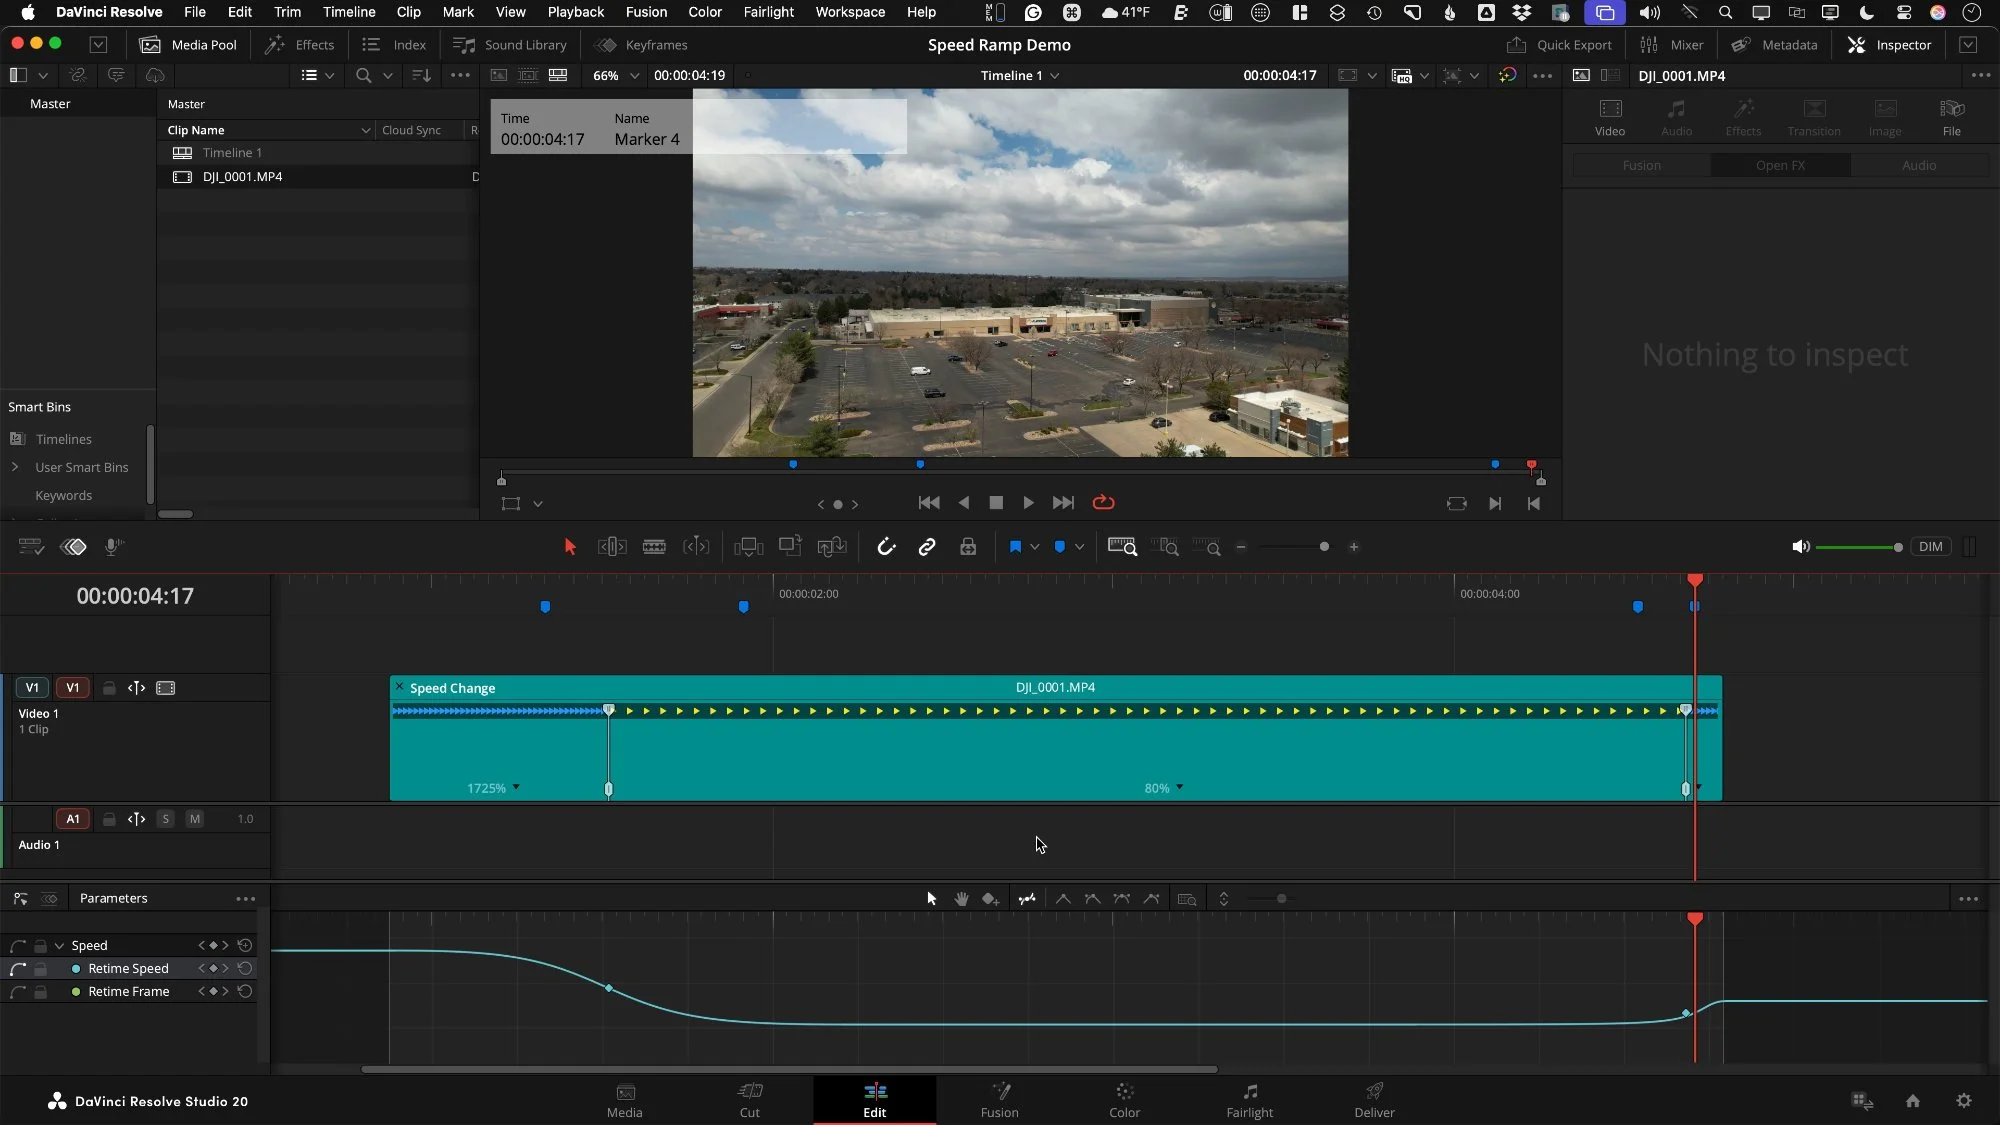
Basic Speed Ramping in the Edit Page
To begin the ramp, we use the Retime Controls directly on the timeline.
Open Retime Controls: Right-click the clip and select "Retime Controls," or use the shortcut Command R (Mac) or Control R (Windows).
Add Speed Points: Place your playhead where you want the speed to change. Click the arrow next to the speed percentage (100%) and select Add Speed Point.
Adjust the Speed: Drag the top section of the clip’s speed bar.
Drag to the left to speed it up (e.g., to 1000%+).
Drag the slow section to your calculated safe percentage (e.g., 80%).
Note: If 80% isn't a preset, select a nearby preset like 75% and then manually drag the speed bar to fine-tune it to 80%, or type the value into the inspector.
Smoothing the Ramp with Curves
A standard speed ramp is often abrupt. To smooth the transition from fast to slow, utilize the new keyframe tray in DaVinci Resolve 20.
Open the Keyframe Tray: Click the keyframe button on the bottom right of the clip on the timeline.
Select Retime Speed: If the curve editor looks empty, ensure you click small grey’d out curve icon, and select Retime Speed to see your curves.
Ease the Keys: Lasso select the keyframes in the curve editor and click the Ease In/Ease Out shortcut button.
Adjust the Handles: Hold Shift while dragging the curve handles to customize the shape of the ramp. This allows you to extend the ease for a smoother roll-off between speeds.
Adding Motion Blur via Fusion
When you speed up footage digitally, you lose natural motion blur, making the motion look choppy. To fix this, we need to trick Resolve's order of operations using a Compound Clip and Fusion.
Set Markers
Before leaving the Edit page, add markers to your timeline to indicate exactly where the speed ramp starts and stops.
Press M on your keyboard to place markers where the clip transitions from fast to slow. These will serve as a reference for when to turn the blur on and off.
Create a Compound Clip
Right-click your speed-ramped clip and select New Compound Clip.
Crucial: Ensure your timeline resolution matches your source footage (e.g., 4K/UHD) so Fusion processes the full resolution. This "bakes in" the speed changes so Fusion sees them as the source video.
Another good alternative method to using a compound clip is to use an adjustment clip on a video track above the retimed footage, and then perform the following Fusion vector motion blur on the adjustment clip instead of the compound clip.
The Fusion Node Tree
With the Compound Clip selected, head to the Fusion Page. We will use two specific nodes:
Optical Flow (OF): Press Shift + Space, type "OF", and add the Optical Flow node. This calculates pixel movement between frames.
Pro Tip: In the Inspector for this node, change the mode from "Advanced" to "Classic". It is slower to render but provides much cleaner, accurate results without artifacts.
Vector Motion Blur: Press Shift + Space and add Vector Motion Blur. Do not use the standard Motion Blur node. Connect this after the Optical Flow node.
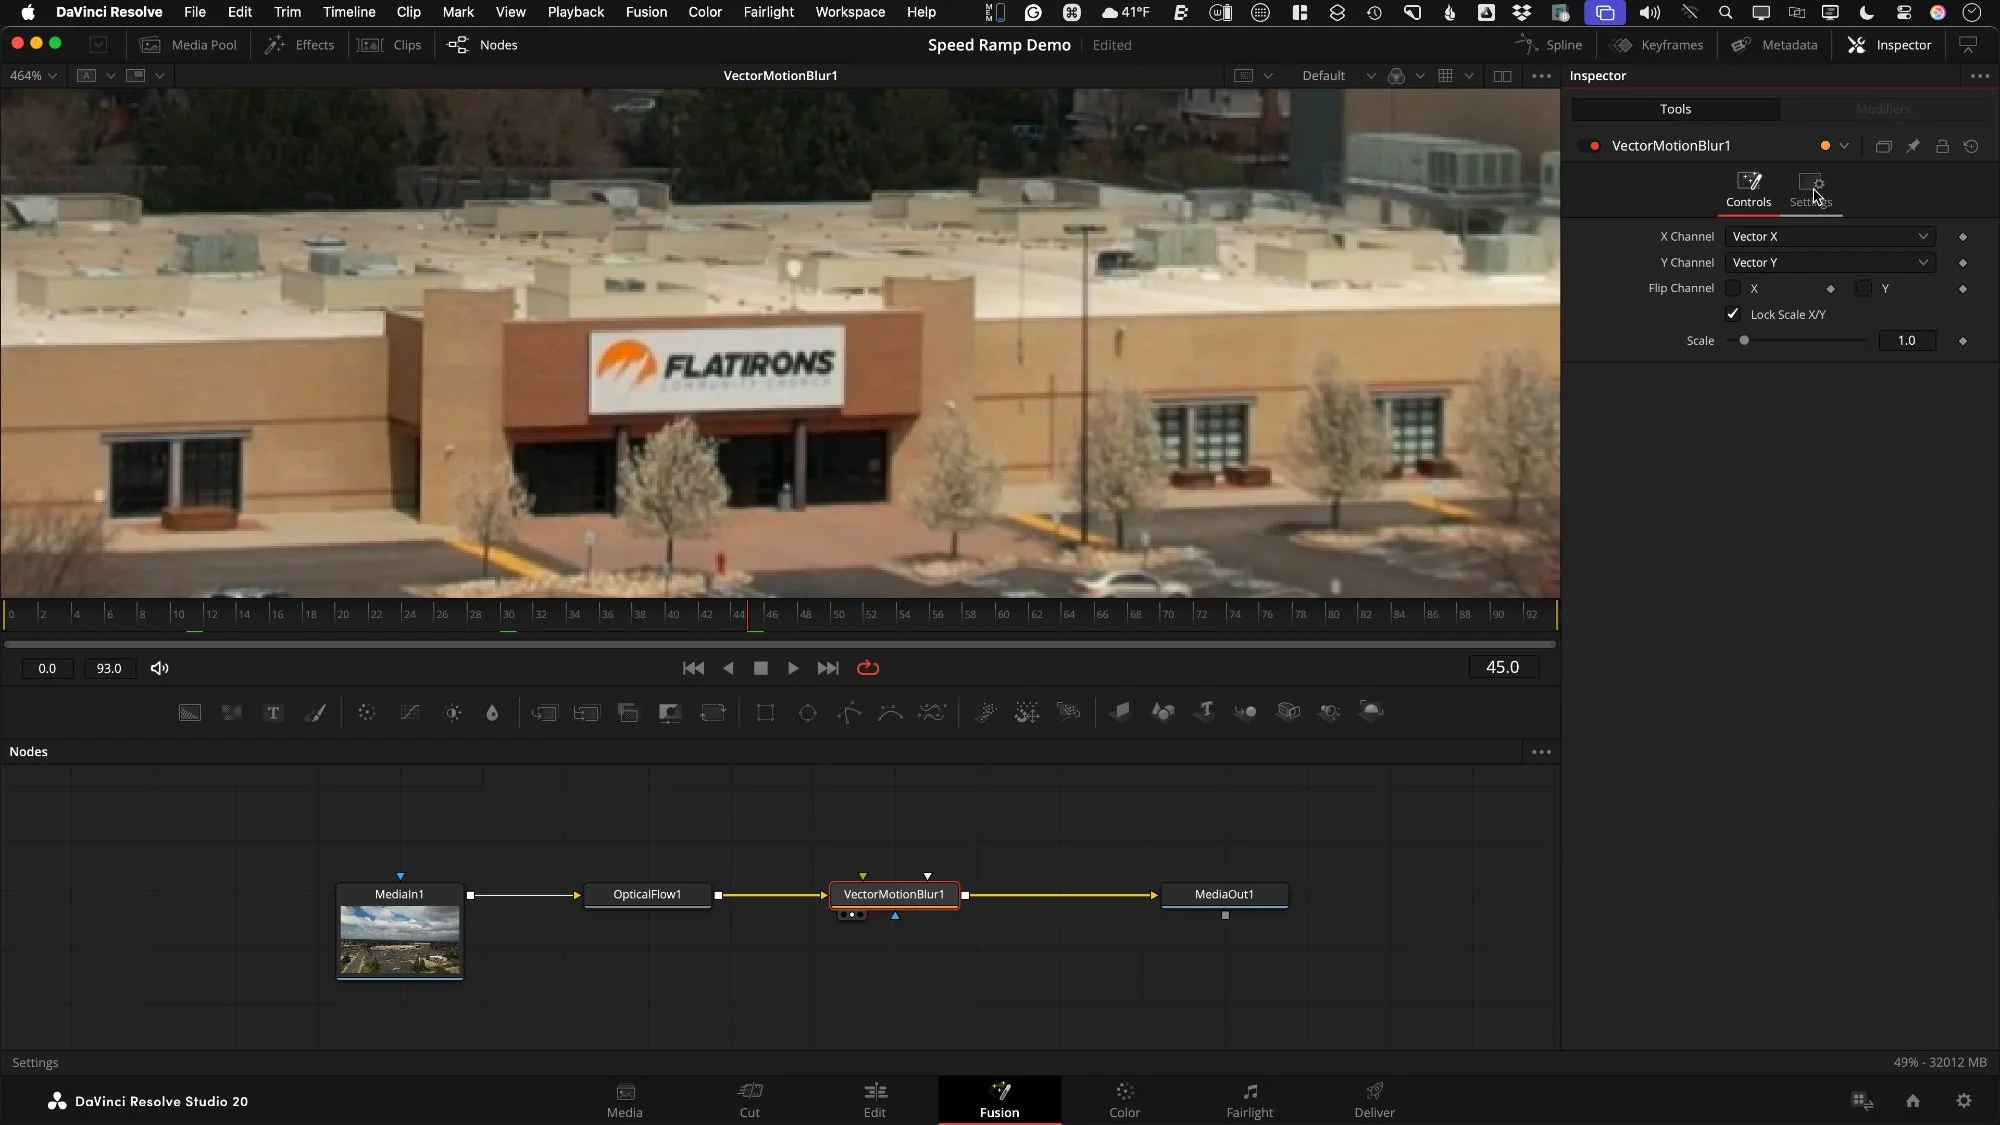
Keyframe the Blur
Vector Motion Blur filters and softens the image, even on slow static frames. You only want it active during the fast sections.
Open the Keyframe panel in Fusion and select Zoom to Fit to see the markers you added earlier.
Select the Vector Motion Blur node.
Animate the Blend slider in the Settings tab:
Set the Blend to 1.0 (Full) during the fast sections.
Set the Blend to 0.0 (Off) during the slow-motion sections.
Use the markers to guide where you ramp the effect up and down.
Playback and Optimization
This process is processor-intensive. To view your work in real-time on the Edit page:
Go to Playback > Render Cache and set it to Smart.
Wait for the red bar above the clip to turn blue.
Once cached, you will see a smooth speed ramp with realistic motion blur in the fast sections and crisp, sharp footage in the slow sections.
Going Slower than 80%
If you need to slow your footage down further than the frame rate allows (e.g., 50%), you can use AI interpolation.
Right-click the clip and "Open in Timeline" to access the guts of the Compound Clip.
Go to the Inspector > Retime and Scaling.
Set Retime Process to Optical Flow.
Set Motion Estimation to Speed Warp (available in the Studio version). This provides high-quality slow motion but increases render times significantly.