
Blackmagic Video Assist Computer Screen Recordings
There are several ways to record a computer screen, including QuickTime Player, OBS, and paid applications like ScreenFlow. While these tools do a good job, they tie up system resources and require you to wait while the computer encodes the video file.
If you want to save time and system resources, you can use a 7-inch Blackmagic Video Assist 12G Recorder Monitor to record your Mac screen in 4K ProRes LT directly to an external SSD. Here is a complete breakdown of the hardware, settings, and software needed for this workflow.
The Hardware Setup
To get this running smoothly, you need the right monitor and a few specific cables.
The Monitor: The 12G model is required to record 4K up to 60 frames per second, while the older models only record in 1080p. The 7-inch version is recommended because it includes a mini XLR audio input.
Video Cable: Use a high-quality 10-foot, ultra-thin 8K HDMI 2.1 cable. A right-angle connector is nice because it allows the cable to route straight down.
Audio Cable: A Kondor Blue mini XLR to full-size XLR cable allows you to plug in a professional microphone.
Storage & Connection: You can record to a Samsung T5 SSD. Connect it using a 90-degree USB 4 or Thunderbolt cable from a brand like Chenlenic.
Power & Mounting: Use a locking power cable so you do not have to rely on battery power. An optional Nitze cage can provide a locking port for your USB-C connection, though it is not strictly necessary for simple screen recordings.
Blackmagic Video Assist Settings
Once your hardware is plugged in, you need to configure the monitor to capture the right balance of file size and quality.
Format: Set your recording format to ProRes LT at 2160p and 30 frames per second.
Audio Routing: Navigate to the audio tab and change the setting to PCM 4 channels. Set your XLR inputs to record on channels 3 and 4. This isolates your microphone audio from the computer's playback audio, which will come over the HDMI input on channels 1 and 2.
Microphone Setup: Under the audio settings, select mic-level inputs and add +25 decibels of gain. You can also enable phantom power if your setup requires it for a condenser mic.
File Naming: On the setup page, create a file name prefix to organize your clips. Turn on the timestamp file suffix so you can always track when the file was recorded.
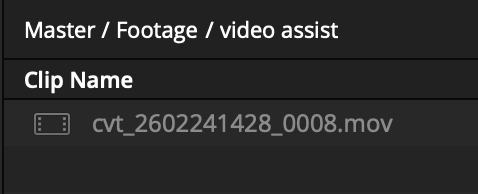
video assist filename convention
Once these settings are locked in, recording is as simple as pressing the record button, and the file will be ready to edit directly off the SSD when you are done.
Mac Display & Better Display Pro Settings
To make tutorials easy to follow, you want your user interface elements to look large (like 1080p) while actually outputting a high-quality 4K signal.
System Settings: In your Mac's display settings, set the BMD HDMI to mirror your main 16:9 working monitor. Set the refresh rate to 30 frames per second.
Better Display Pro: Run an app called Better Display Pro alongside your normal display settings.
Configuration Overrides: In the Better Display menu under the BMD HDMI output, enable "more system configuration options". Check the boxes to manually override the native resolution and default resolution to 3840 by 2160 at 30Hz.
Scaling: Finally, change your main Mac monitor's resolution down to 1920 by 1080. This forces the screen to act like a 1080p monitor to enlarge the items, but it mirrors them in 4K over to the Video Assist.
Audio Routing on the Mac
If you only need to record system audio, you can simply change your Mac's sound output to the BMD HDMI. However, if you want to hear your computer's audio through your headphones from a usb audio interface while recording, you need to create a multi-output device.
Open the Audio MIDI setup application on your Mac.
Click the plus button at the bottom left and select "create multi output device".
Check the boxes to route audio out to both the BMD HDMI and your connected USB audio interface.
Select this new multi-output device in your Mac's system sound settings.
Bonus Software Tools
To make your screen recordings even better, consider running two extra applications.
Cursor Pro: This app places a circle outline around your cursor so viewers can track it easily. By holding the control key, you can dynamically zoom in on the screen to show specific details.
Keystroke Pro: Created by the same company, this app allows you to bake your keyboard shortcuts directly into the screen recording so you do not have to edit them in later.
Links provided are affiliate links and help support the channel & website at no additional cost to you.