
DaVinci Resolve 20.3 Updated Features
Top 4 New Features
DaVinci Resolve 20.3 has just been released, and it comes packed with workflow improvements that can significantly speed up your editing process. Here is a breakdown of the top four features found in this update.
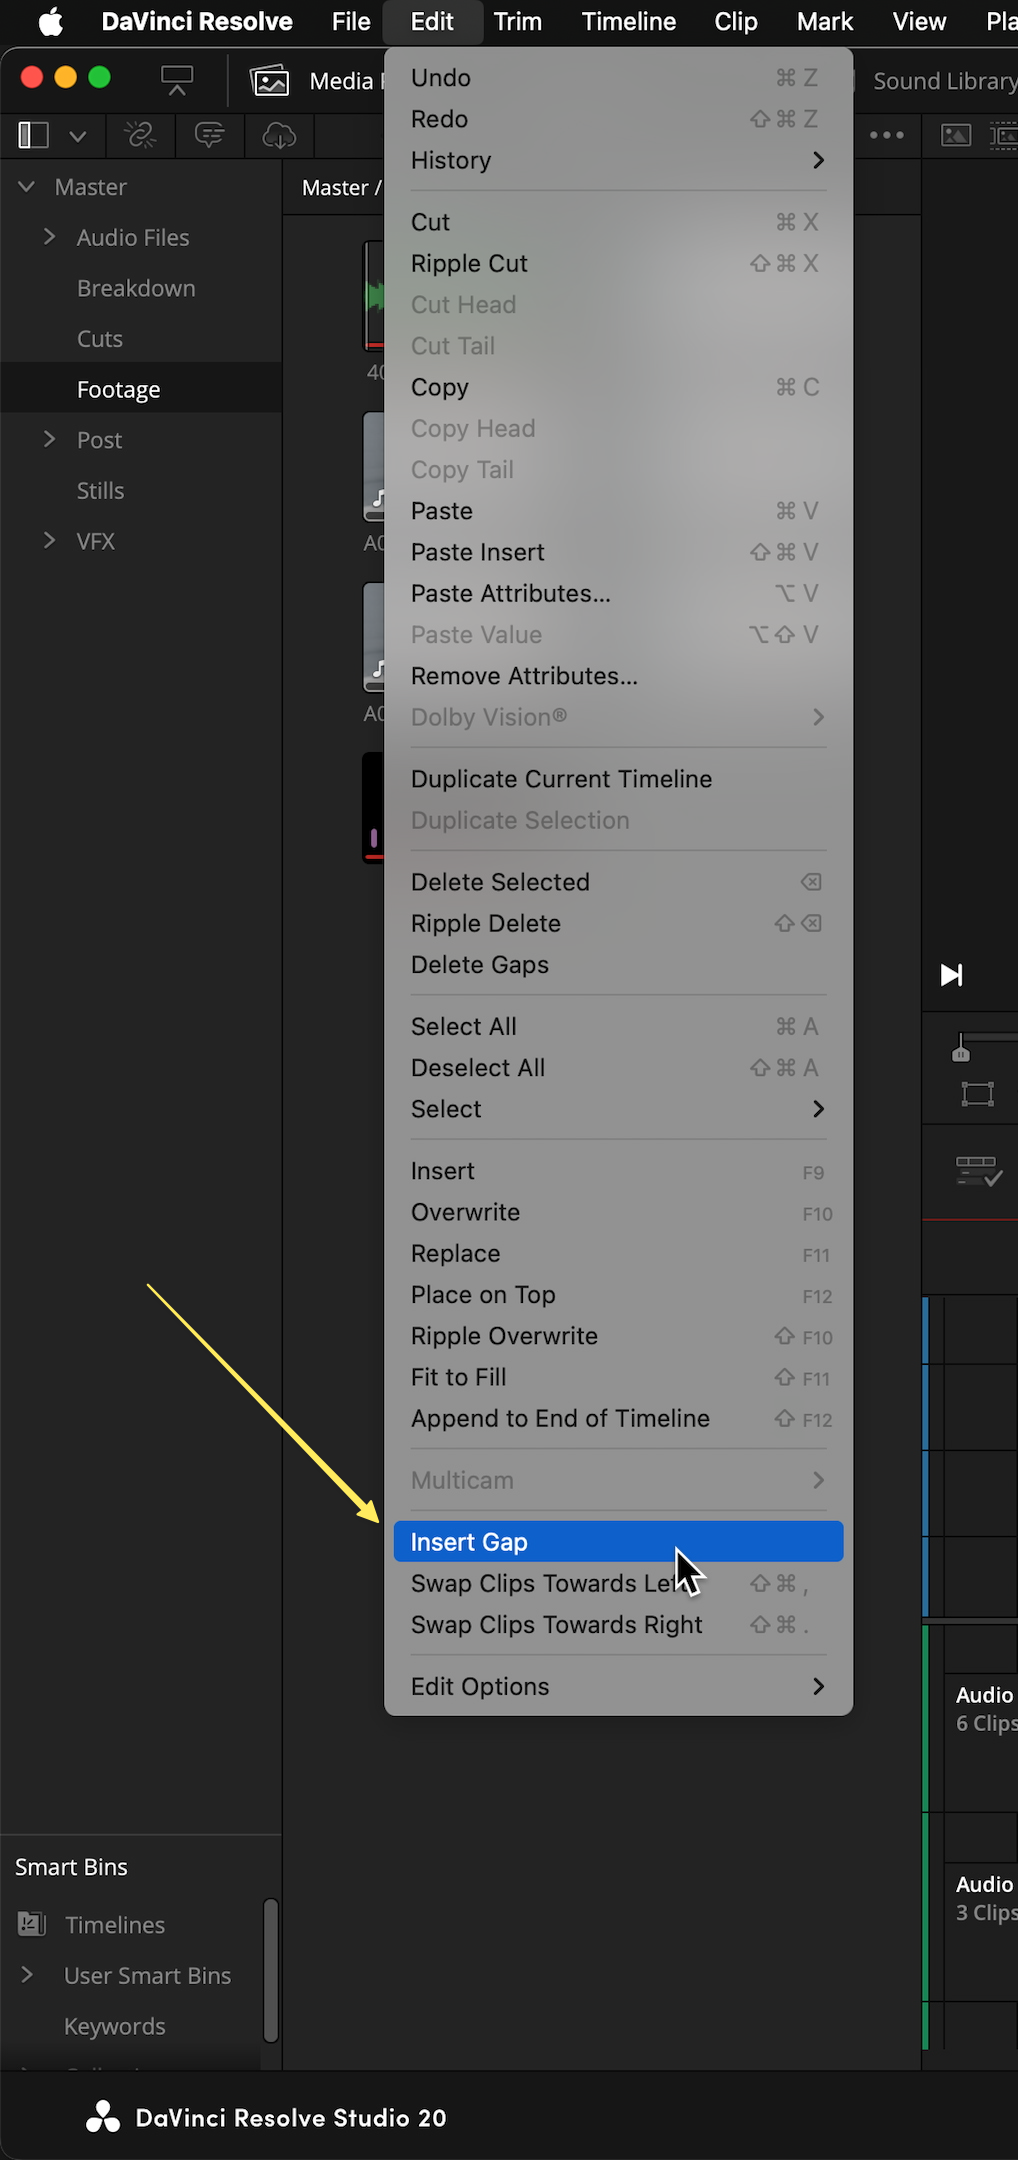
Insert Gap at Playhead
The "Insert Gap" function is a powerful new tool located under the Edit menu. Previously, creating space in a timeline involved using Option/Alt + Y to select everything to the right and then manually moving clips, with either your mouse or entering numbers with the number pad. But this method can’t splice a clip at the same time.
Now, this feature pushes everything down to open a gap, helping you pace out your edit, while also splicing the clip that intersects the playhead. It also respects the new sync locks, ensuring your timeline stays in sync.
Pro Tips for Using Insert Gap:
Custom Shortcut: To avoid navigating the menu every time, assign "Insert Gap" to a keyboard shortcut. A logical choice is the G key. Note that "G" is often assigned to "Add Flag" by default, so you may need to remove that conflict in the keyboard customization menu.
Controlling Duration: By default, the gap duration matches your "Standard Still Duration" found in
Preferences > User > Editing. However, you can override this on the fly. Simply type a value on your number pad (e.g.,+8for eight frames) and then hit your Insert Gap shortcut. The gap will obey the specific duration you typed.
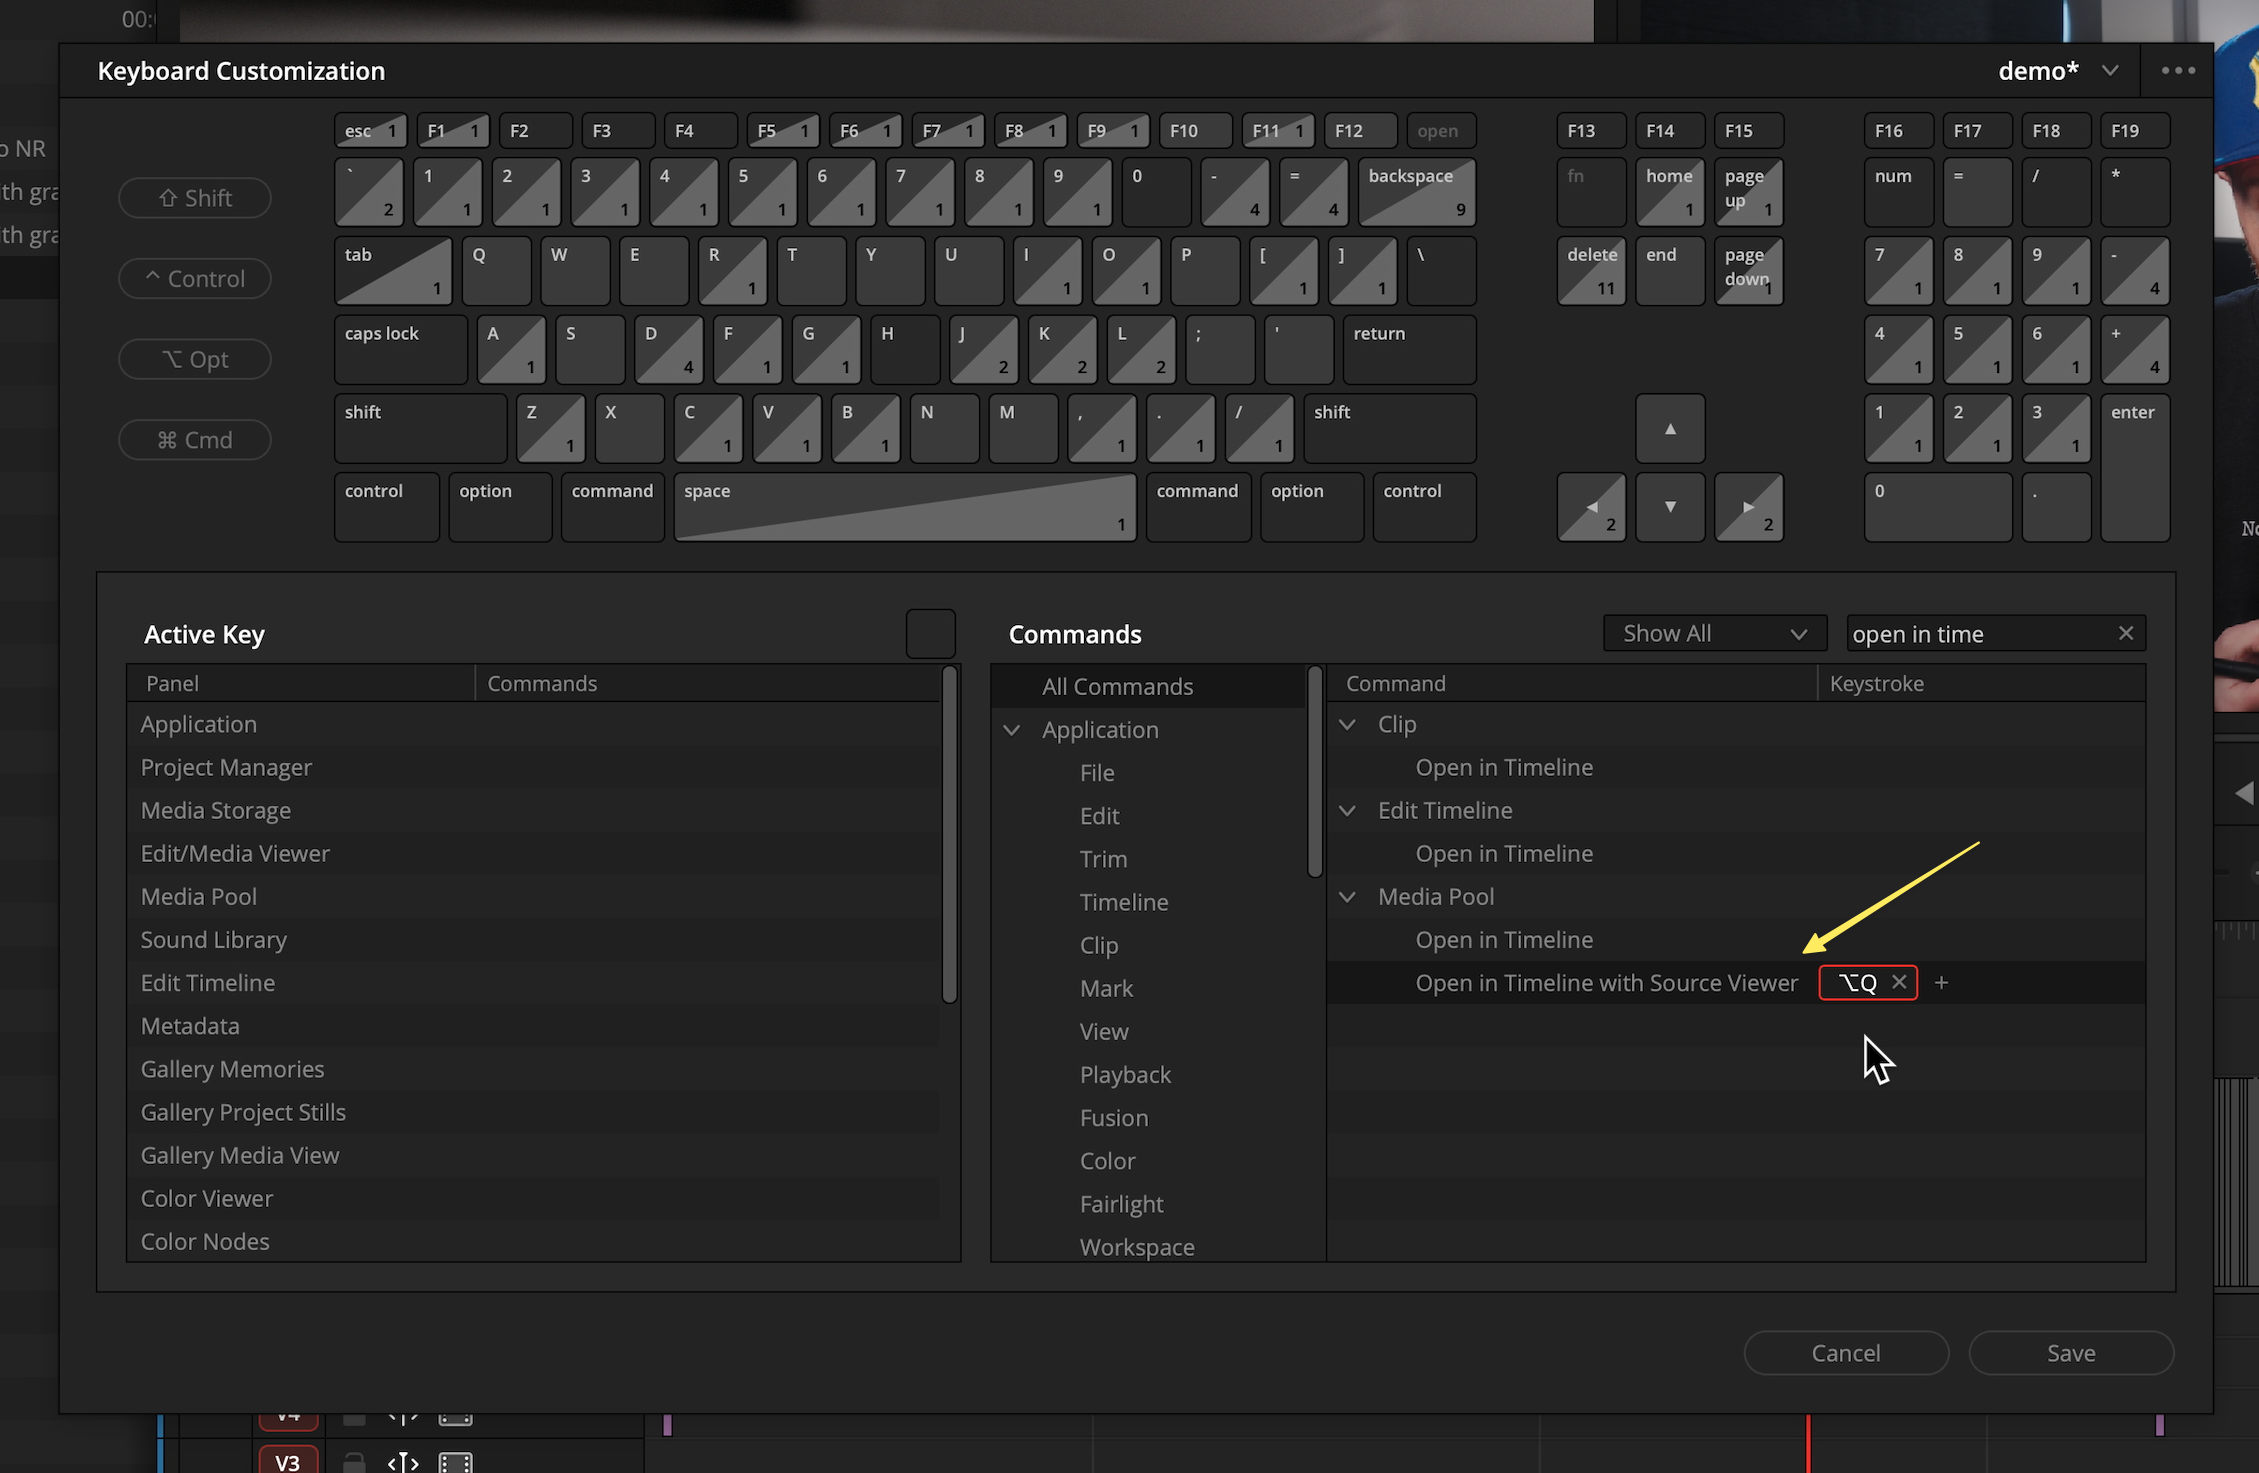
Open Timeline in Source Viewer
This feature is for editors who work with "selects" timelines or string outs and love keyboard navigation. It allows you to load an entire timeline into the Source Viewer (the left window) to edit directly into your active timeline.
How to set it up:
Open the keyboard customization menu and search for "Open in Timeline".
Assign a shortcut, such as
Option/Alt + Q.Navigate to your bin (
Command + 1) and select a timeline (Command + 2).Hit your shortcut to load that timeline into the source viewer.
Once loaded, you can mark in and out points on your source timeline and 3-point edit those clips directly to your main creative timeline.
Manually Named Timeline Backups
DaVinci Resolve 20.3 now allows for manually named timeline backups that are retained within the original timeline. This is ideal for creating specific restore points before trying a complex edit or visual effect. It also keeps your project cleaner by having this snapshot contained within the main timeline.
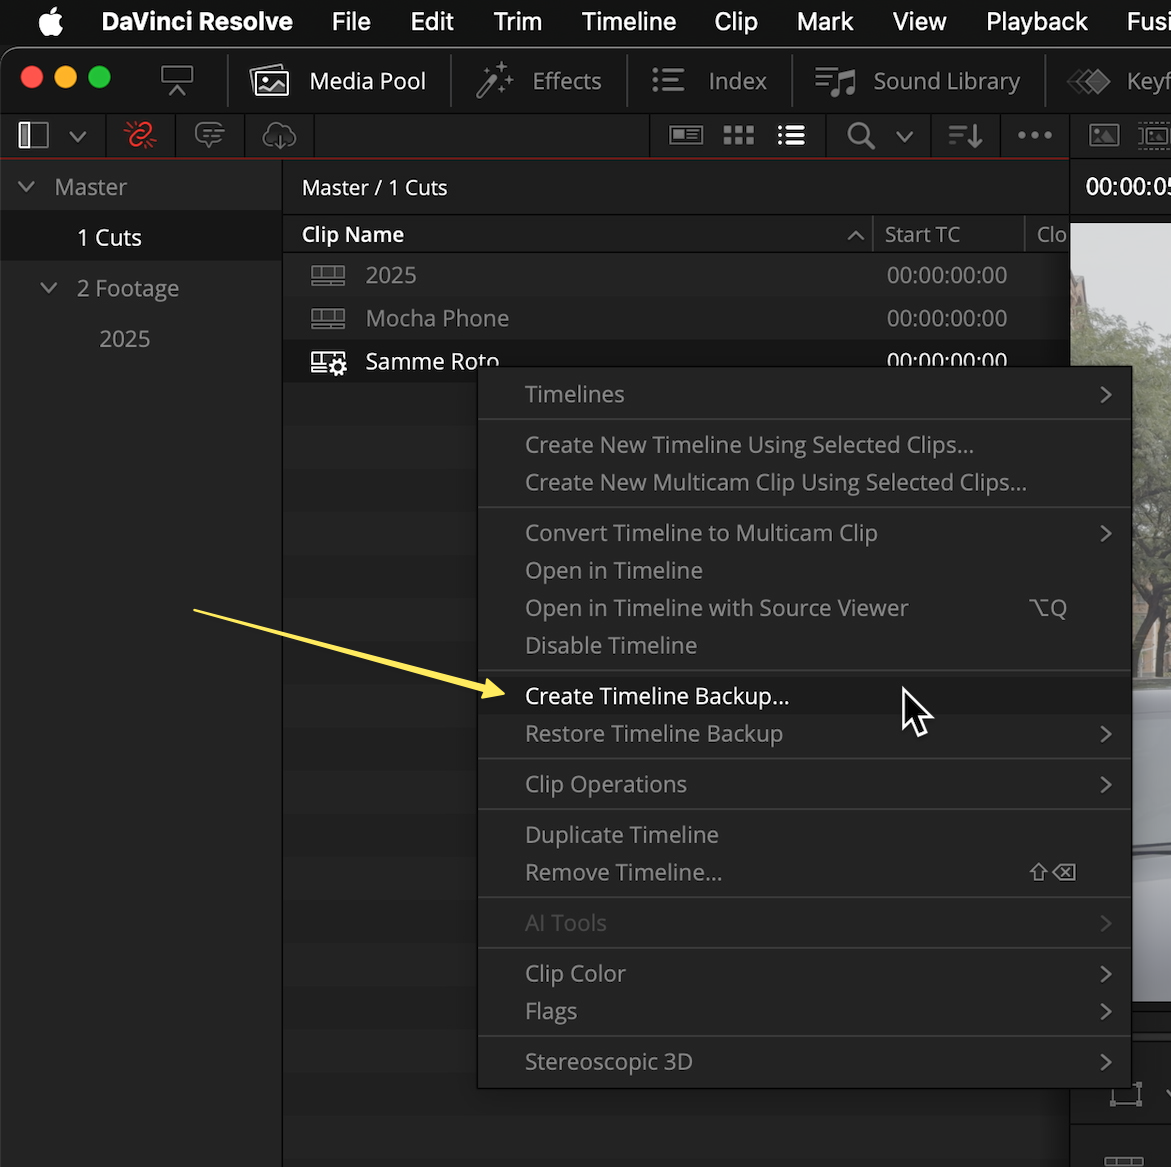
How to use it:
Create: Right-click a timeline in your bin and select Create Timeline Backup. You can enter a custom name (e.g., "Sammy Roto backup 1").
Restore: If you need to revert, right-click the timeline, select Restore Timeline Backup, and choose your specifically named file from the list. This will create a new timeline in the media pool from that saved timestamp.
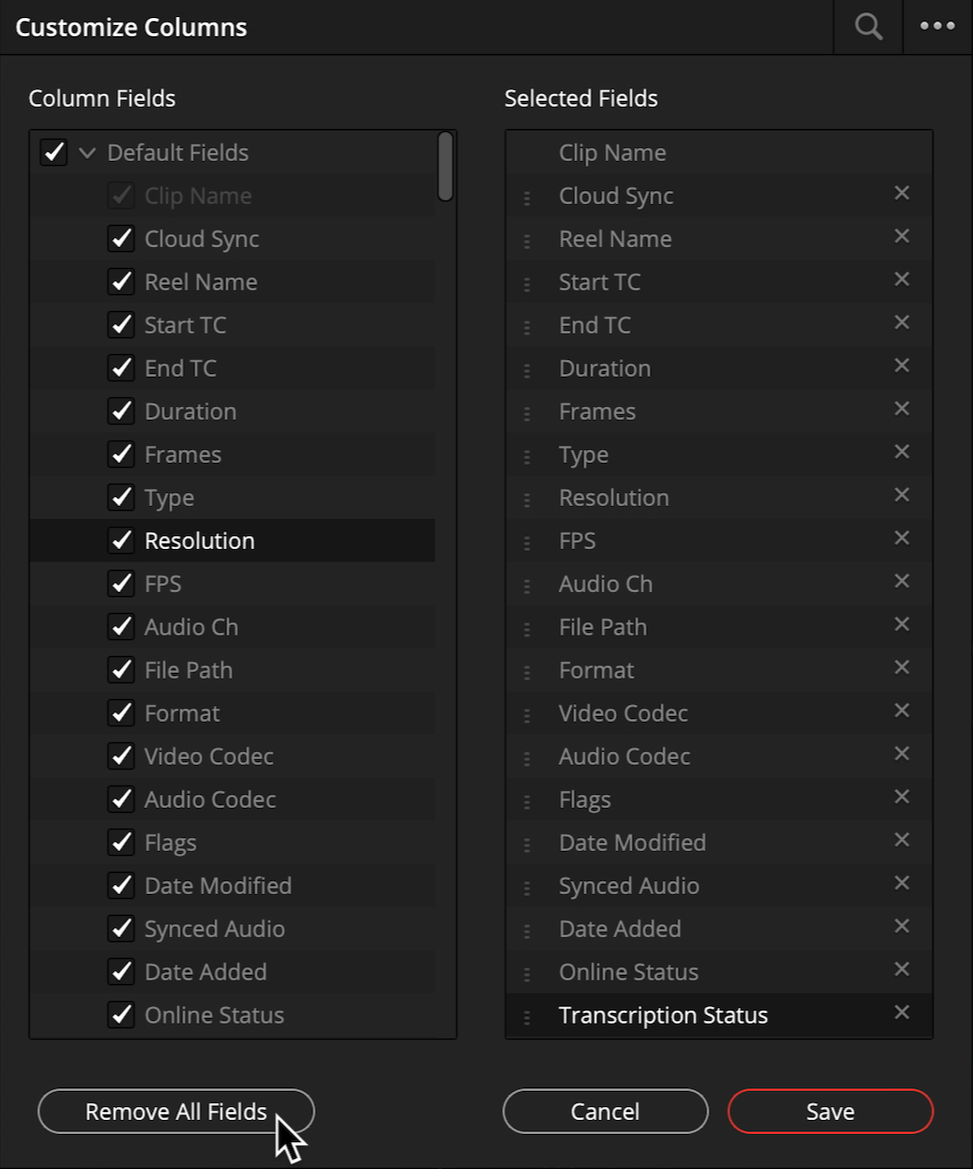
Custom Media Pool Columns
Managing metadata in the media pool is now much more efficient. You can customize the visible columns and, crucially, save these layouts as presets.
Key improvements:
Remove All Fields: When customizing columns, there is now an option to "Remove all fields," allowing you to start with a clean slate rather than unchecking boxes individually.
Save Presets: After selecting your preferred columns (e.g., Resolution, FPS, Codec, Clip Color), you can save the layout as a new preset. This makes sorting through footage based on specific metadata—like finding all B-RAW clips—much faster.
What is your favorite new feature in DaVinci Resolve 20.3? Let us know in the comments!