Magic Mask 2 Hack for Better Edges
How to Fix "Chattering" Magic Mask Edges in DaVinci Resolve
Have you ever struggled with the Magic Mask tool in DaVinci Resolve? It is a powerful feature, but you often get a "chattering edge" that looks messy—especially when the subject is small in the frame. Today, we are going to look at a secret Magic Mask trick inside the Fusion Page of DaVinci Resolve 20 that uses cropping and scaling to create a much cleaner result.
The Concept: Crop, Scale, Mask, Revert
The secret to this trick is cropping out the sections of the video that we don't want Magic Mask to look at. By doing this, we can "blow up" the image scale to create more detail for the tracker. We perform the Magic Mask on this larger version, and then scale everything back down to fit the original composition. Here is the step-by-step workflow.
Isolate the Subject
First, you need to isolate your subject (for example, a person walking) who might be small relative to the frame.
Add a Crop Tool (CRP) into your flow.
In the viewer options (upper left), select Allow Box Selection.
Click and drag inside the viewer to draw a box around the area where the subject is moving.
Ensure the subject does not go off the edge of your cropped box; use the Inspector offsets to adjust the box if necessary so they stay contained.
Blow Up the Image
Next, we increase the scale of the image so the edges have better filtering.
Add a Resize node (
Shift + Space + Resize).This node will stretch the image based on the Media In resolution.
Crucial Step: In the Inspector, check Keep Frame Aspect to avoid working with a distorted image.
Apply Magic Mask
Now that we have a high-detail, cropped version of the subject, we apply the mask.
Add the Magic Mask node (
Shift + Space + Magic Mask).Draw your selection stroke on the subject (e.g., the shirt).
ProTip - leave the checkbox for premutliply off so you can see areas that have not been fully selected.
Set the quality to "Better" and, in the Refine Range settings, slide the value down to 1.
Hit the track buttons to render the mask.
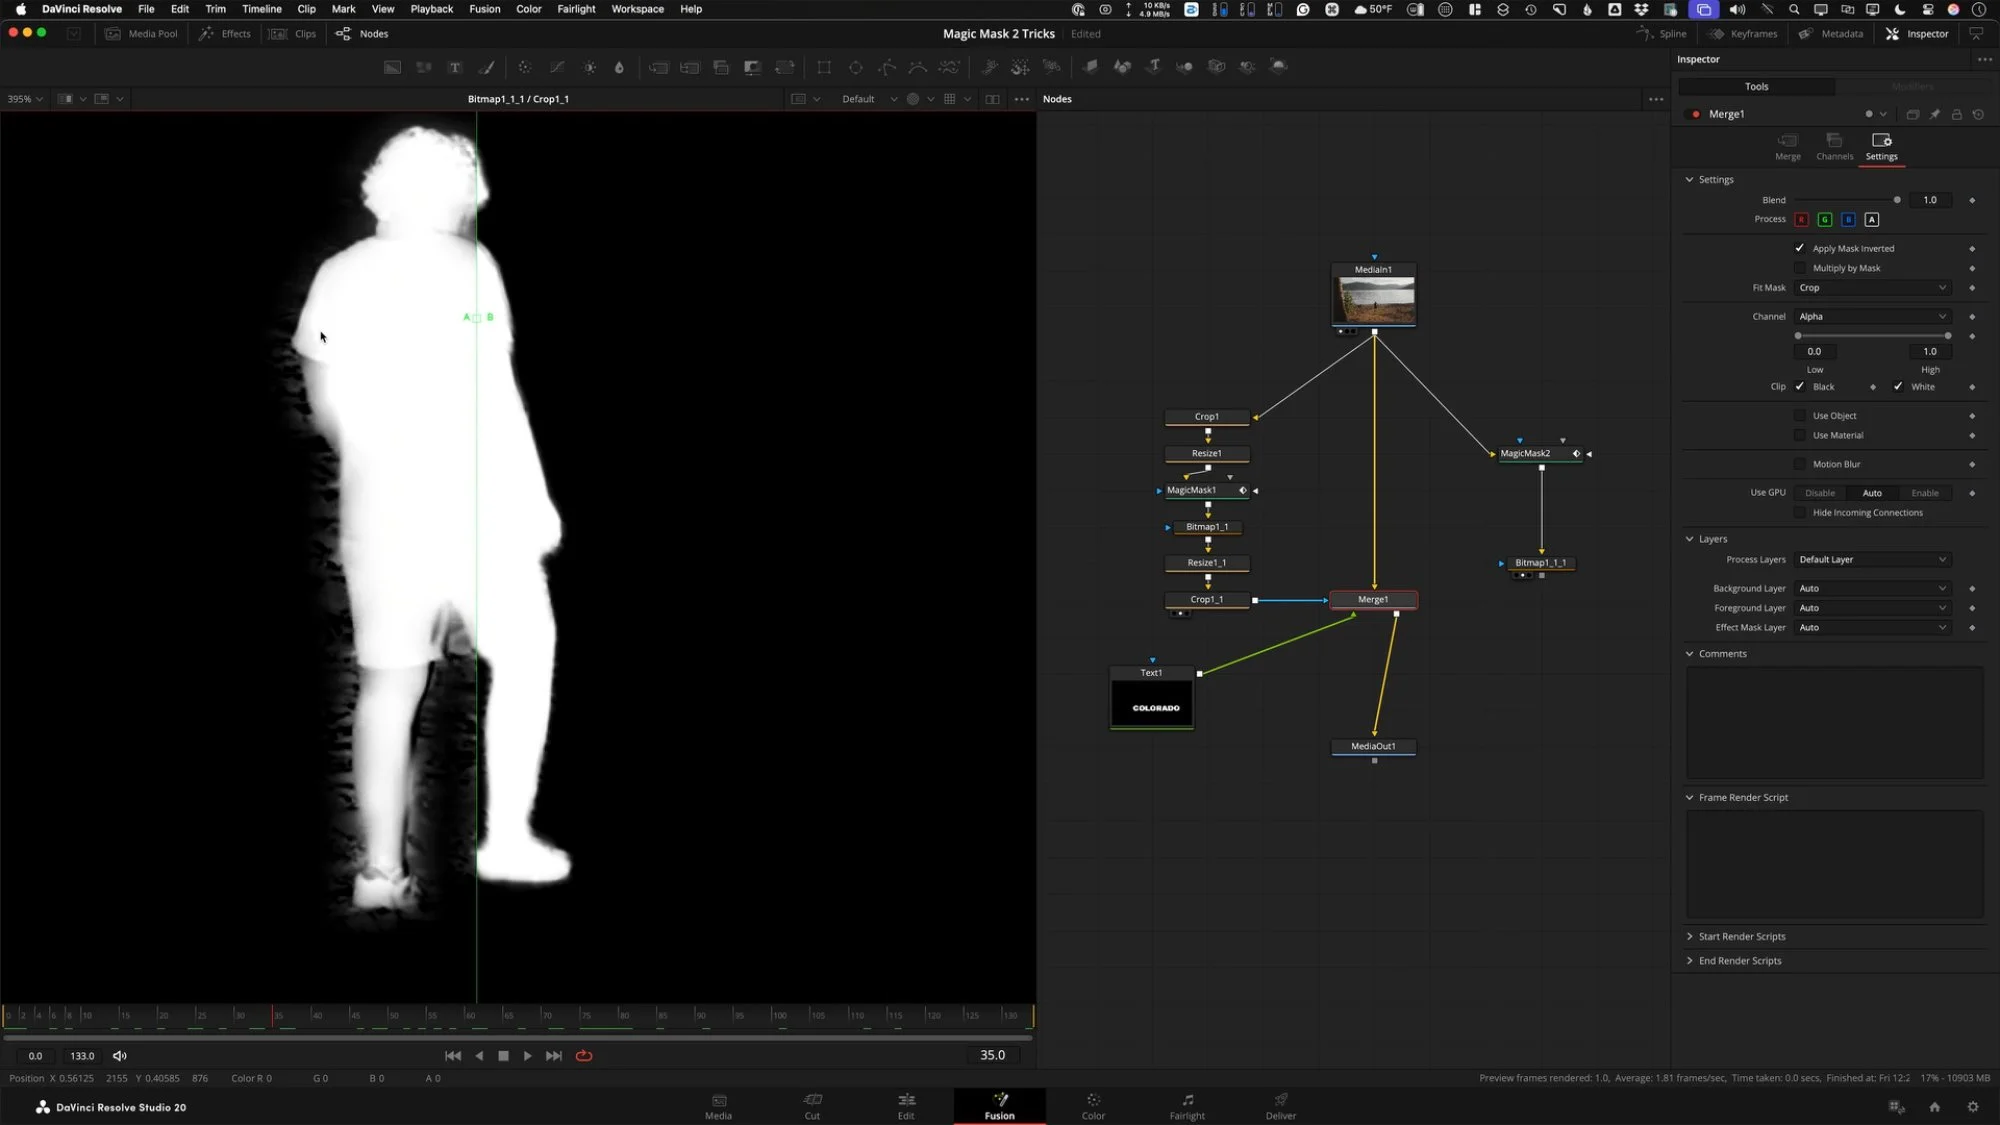
Convert to Bitmap (Optional but Recommended)
To keep the node graph clean, it is helpful to strip the color data and work only with the alpha channel.
Add a Bitmap tool after the Magic Mask with it set to “alpha”.
This removes RGB pixels, ensuring you are only using the alpha channel for the mask.
Invert the Scale and Position
We now have a perfect mask, but it is the wrong size and in the wrong place. We need to invert the work done in Steps 1 and 2.
Resize Down
Copy (
Command C) and Paste (Command V) your Resize node and place it after the Bitmap tool.Look at the upper right corner of your original Crop Tool to find the specific resolution you cropped to.
Enter that resolution (e.g., 584) into the Width of the new Resize node. If "Keep Frame Aspect" is on, it will calculate the Height automatically.
Reposition (Un-Crop)
Copy your original Crop node and paste it after the second Resize node.
In the Inspector, invert the X and Y offsets by adding a negative sign to the original numbers.
A cool expression can be used instead of typing the negative offsets
-Crop1.XOffset
-Crop1.YOffset
Change the Size back to the original Media In resolution (e.g., 3840 x 2160).
This essentially places the mask back into the exact location of the original plate.
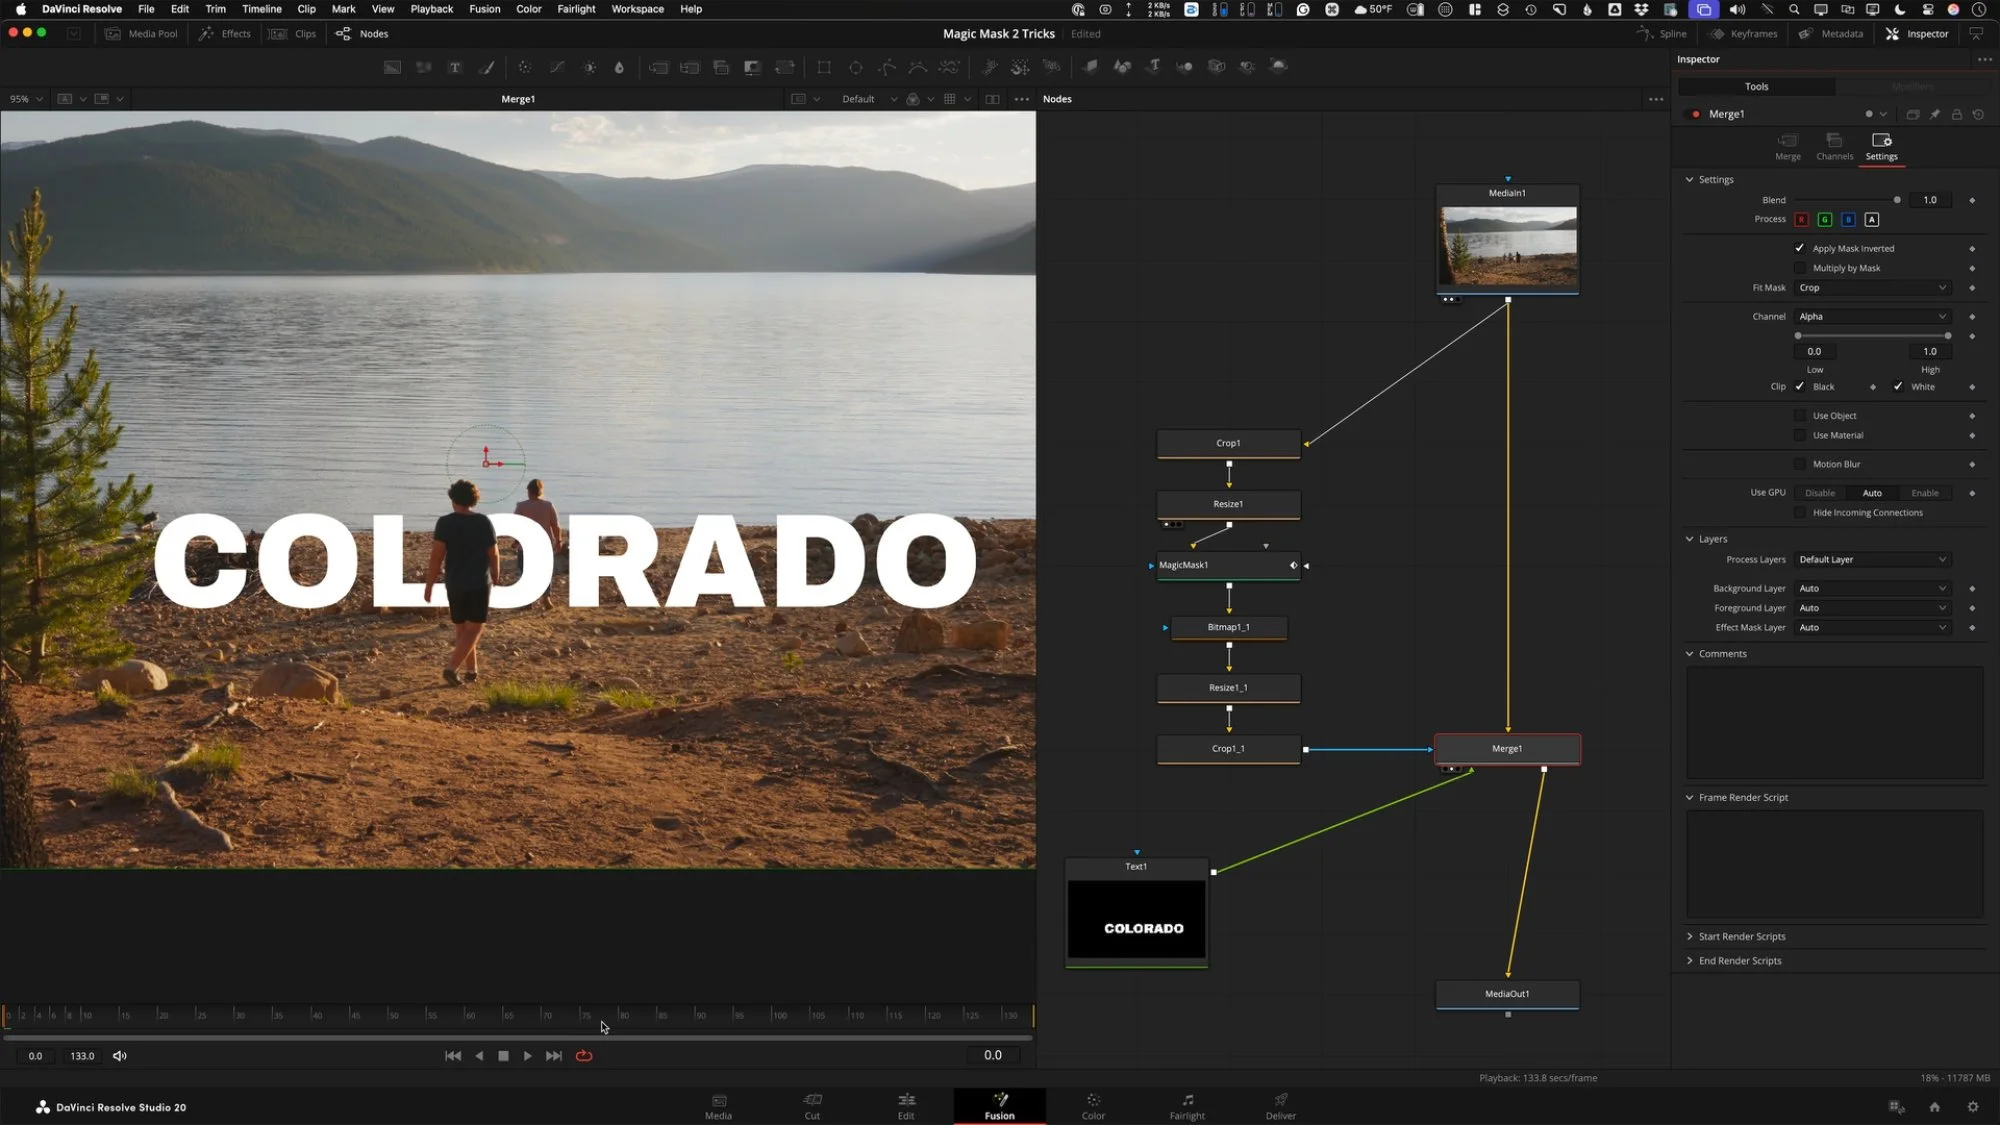
Practical Use: Text Behind Subject
A common application for this is placing text behind a walking subject.
Use a Merge node with your original footage in the background and a Text node in the foreground.
Take the output of your "Magic Mask Hack" chain (the final inverted Crop node) and plug it into the Mask Input (blue arrow) of the Merge node.
In the Merge settings, check Apply Mask Inverted.
The Result
When comparing this method against a standard Magic Mask applied to the full-resolution image, the difference is clear. The standard version may contain "garbage" and flickering edges, while the scaled-up version creates a significantly cleaner mask.