
Import & Update Photoshop Layers into DaVinci Resolve
If you try importing a photoshop file directly into the timeline, it will flatten all the layers. But there is another way. So in today's video, I'll show you how to import layered photoshop documents into DaVinci Resolve. And I also want to show you my top secret tip to update the PSD changes after it's already on your timeline.
I have a Photoshop file with five layered titles and a gradient background. You can see each layer solo'd by option or alt clicking the eyeball icon.

Import Photoshop Layers into Resolve
Now to import this into DaVinci Resolve, we need to start by right-clicking in the media pool and choosing to create a new fusion composition.
Make it as long as you think you might need it, and set the frame rate to match your deliverables.
Double click it, and now you're in Fusion, but don't sweat it. I'm here with you. This will be very simple.
Go to the Fusion menu, down to Import, and choose PSD.
Navigate and open the PSD you'd like to edit into your video.
Just like that, you have individual nodes for each layer. It's visually upside down from what was in photoshop, but the order is still the same.
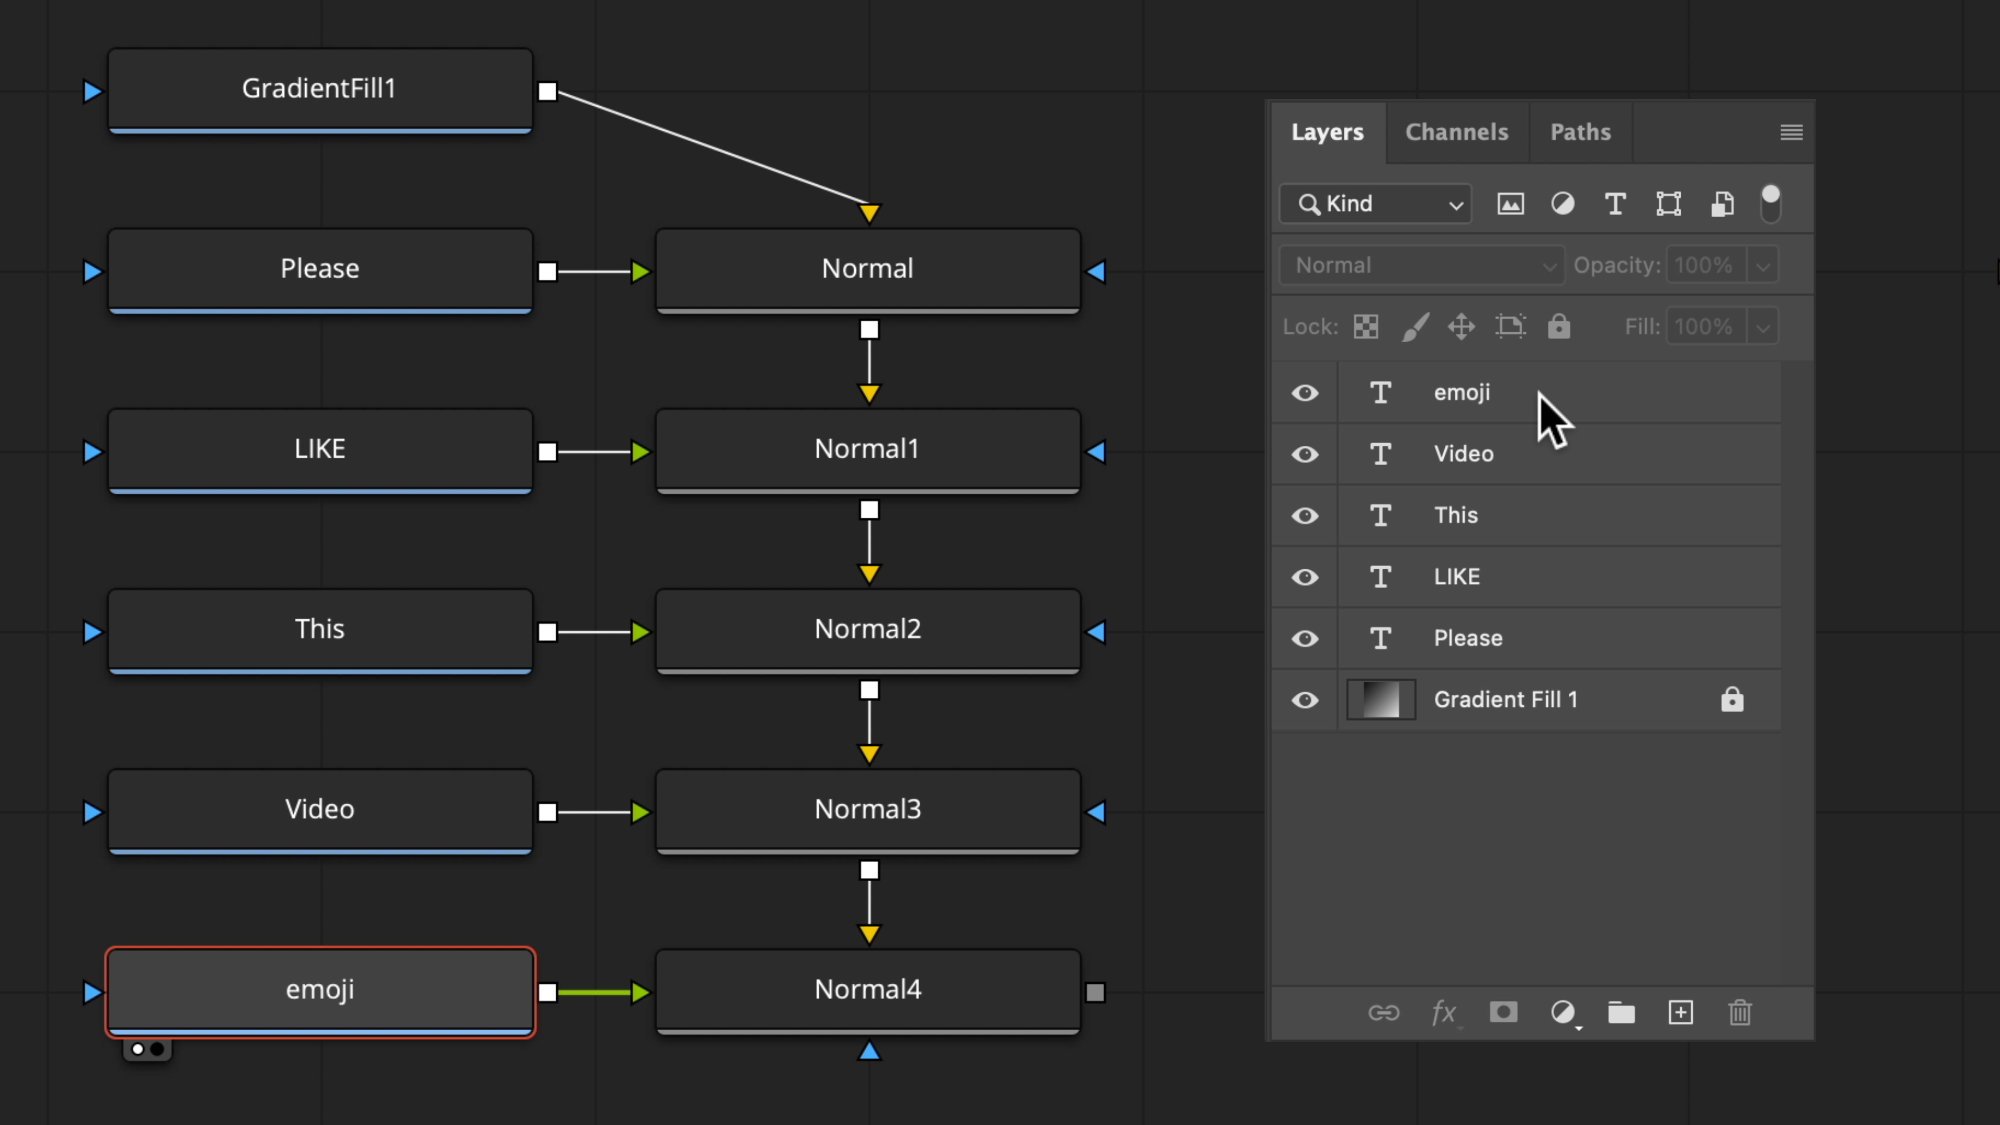
To see all the layers merged together, drag the grey output box of the top layer, which is now at the bottom of the input of media out.
The media out node is how Fusion flattens this composition out to a timeline to see on the edit page. Without this connection, it would be a black screen.
Now the normal nodes here are just 2d merge nodes that combine the layers into a single video image, but we don't need those for this demo because I want to show you how to break this into five separate text titles with the gradient background.
So let's get rid of them. Click and drag to select them and hit delete.
To preview the other photoshop layers, drag them up to the left viewer. If it's not visible, click this dual single viewer button.
The critical thing to know is that media out is what ends up on the timeline, so make sure to click and drag media out to see what you'll end up with when you toggle back to the edit page, which is Shift 4, to get there quickly.
Break Apart the .PSD File into Clips
To break the fusion comp into individual clips from photoshop layers, drag it onto a timeline.
Duplicate it by option or alt dragging to video track 2. Also, if you hold shift, you can constrain the left and right position.
Now place cuts where you want to change to a new title graphic.
And each of these segments on the timeline will act like independent Fusion comps, but what makes this special is that they all link back to the original PSD file, which is editable.
Place the timeline playhead over the first clip.
Go back to Fusion
Disconnect the flow connection by clicking on the right half of the line.
Click and drag from the grey output of the first text layer to media out.

Go back to the edit page, and you have text!
Rinse and repeat for the rest
Refresh .PSD Changes in Resolve
Open Photoshop, make the change, maybe the color?
And save it.
Back in Resolve, here's the trick to force a refresh on the timeline.
Double click the PSD to load it into the source viewer.
And then, for a couple of seconds, scrub another area of the timeline, back and forth, which seems to purge the memory, so DaVinci Resolve looks at the newly saved version of the PSD. You should now be able to see and playback the change.
