
Tricky Little Things in DaVinci Resolve Episode 1
I’ve used DaVinci Resolve for over 10 years, but it seems like every week, I’m still learning something new, like hitting the dropdown NEXT to the search button to search the entire project by filename for a matching clip or timeline.
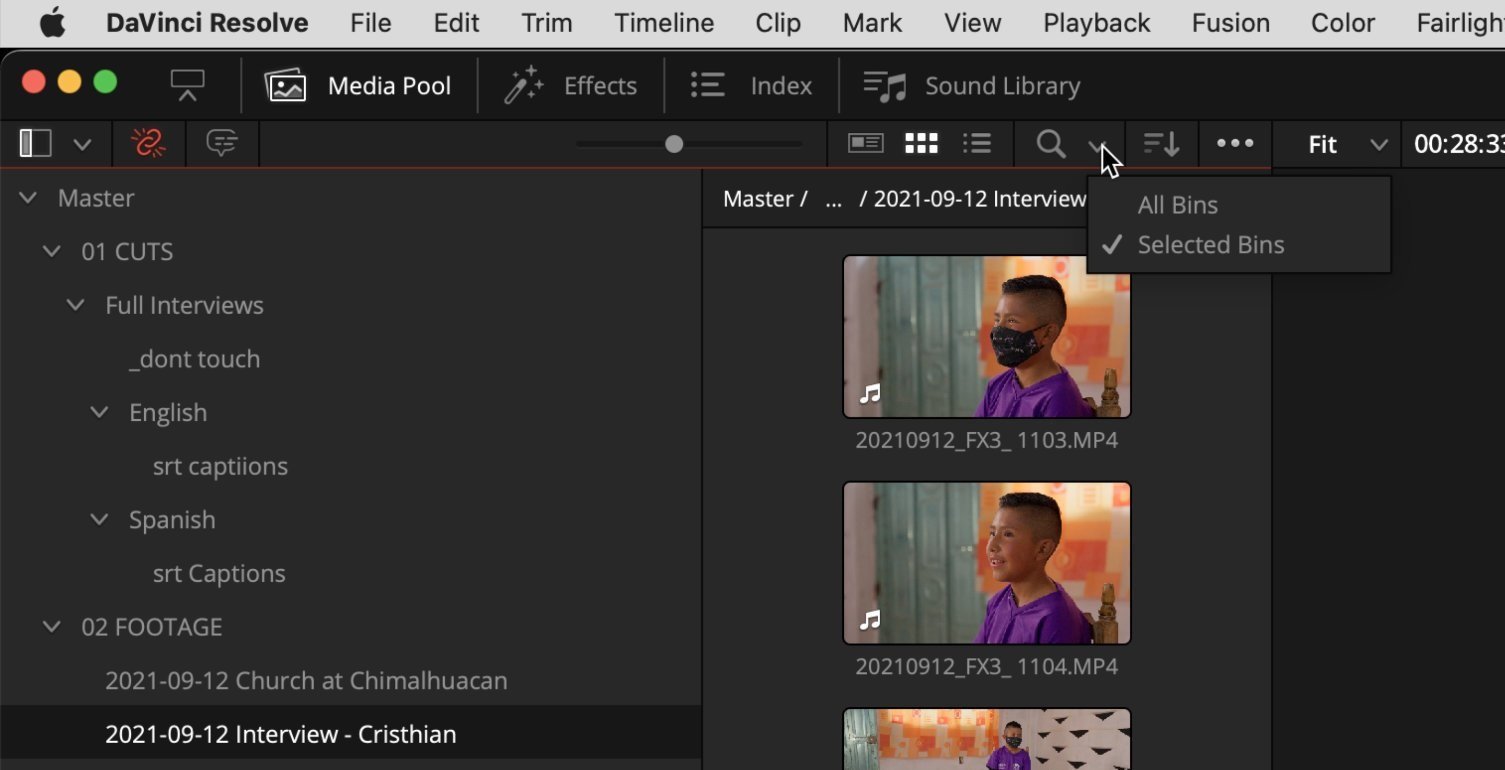
Or there’s this little trick to CLOSE UP ALL of your expanded BINS by holding down the option or alt key while clicking on the master bin.
Nice! Right? In just a few minutes, I’ll show you some lesser-known tricks I use all the time, and hopefully, you’ll find them useful too.
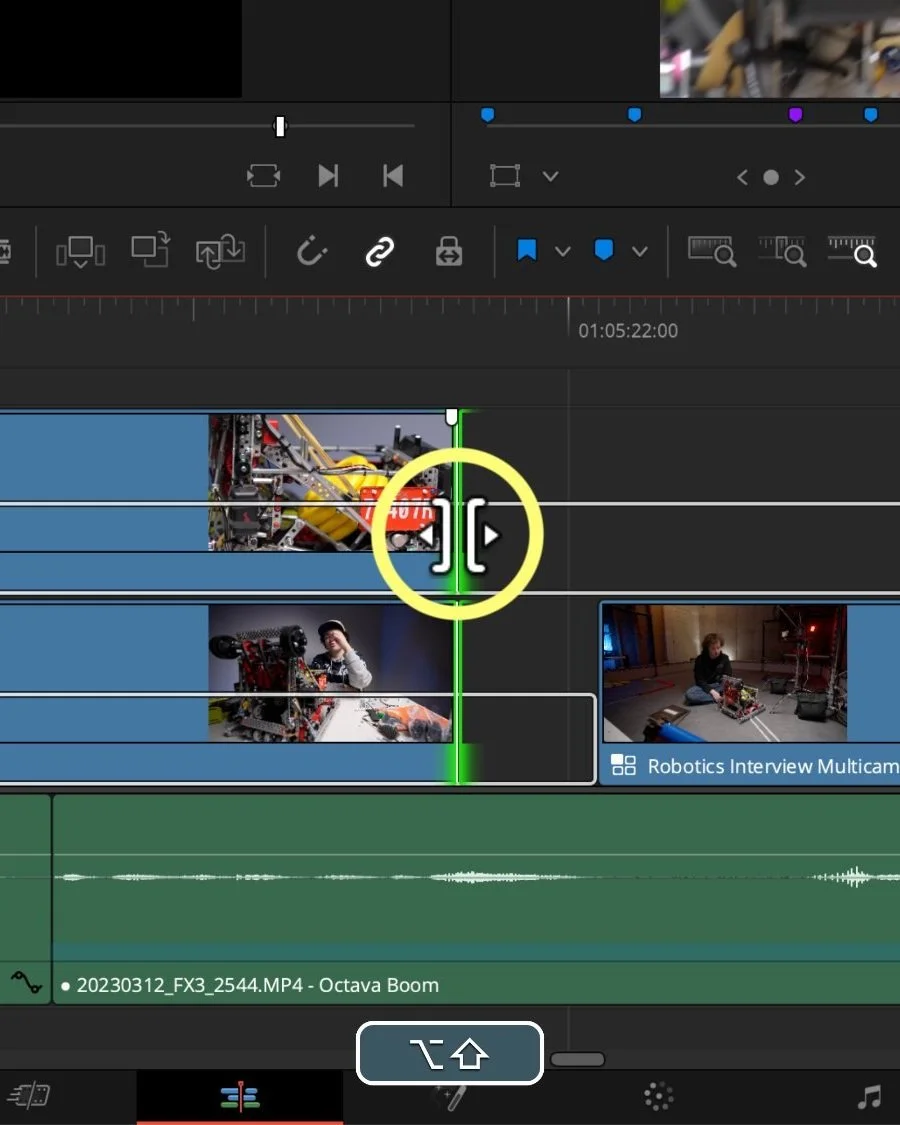
Lasso Trim
I call this the “normal edit mode lasso trim.”
Anytime you want to make a quick edge selection of a clip with the mouse, MOST EDITORS (I’m saying that because this was me until recently) would hit the “T” key or hit this button to enter trim mode and then drag a selection over the edge of the clip to trim it up.
However, instead of changing to trim edit mode, you can stay in normal edit mode and simply hold Option/Alt with shift and just lasso drag the selection with your mouse.
So bookmark that one - the option shift mouse drag for selecting the edges of clips.
Oh, and before you remind me that you can use V to select the nearest edit point with the keyboard shortcut. Yes, that works, but what if you have a stack of clips with some graphic layers that all need to be trimmed together. This is when the NORMAL EDIT MODE LASSO TRIM really shines!
Place on Top with Timeline Overlay
There’s a trick to Place on Top that you maybe haven’t ever used before.
And you’re an experienced editor, you might PREFER to cut with precision into your timeline using a 3-point edit. But how do you do that with a generator, adjustment clip, or title?
First, mark your timeline with an In and Out point. I and O on the keyboard, or if you’re a left had driven editor - I use E and R - but that’s for a tutorial another day.
Now drag your Generator or title directly from the Effects panel over the right-side viewer, or it’s the only one visible if you don’t have both visible, and bam!
You have placed the effect generator onto the timeline specific to your in and out marks.
The reason I like to highlight place on top is that it removes the complexities of patching your destination to a specific track, which is what these important orange boxes do.
Place on Top does what it says it does. It’s a lot like the connect edit feature in Final Cut Pro, where there is no track patching at all.
As a bonus tip, if you mostly use this drag-and-drop trick with place on top, you can set this as the default in user editing settings with the checkbox for “timeline overlay retains the last performed actions”. This means you don’t need to drag it specifically to that far-right overlay box.
Oh, and Place on Top also works to spot new audio tracks or mixes down to your timeline WITHOUT the dragging overlay function because it also works from the media pool bin with the shortcut F12. It creates new timeline tracks as needed, so that is super useful too!
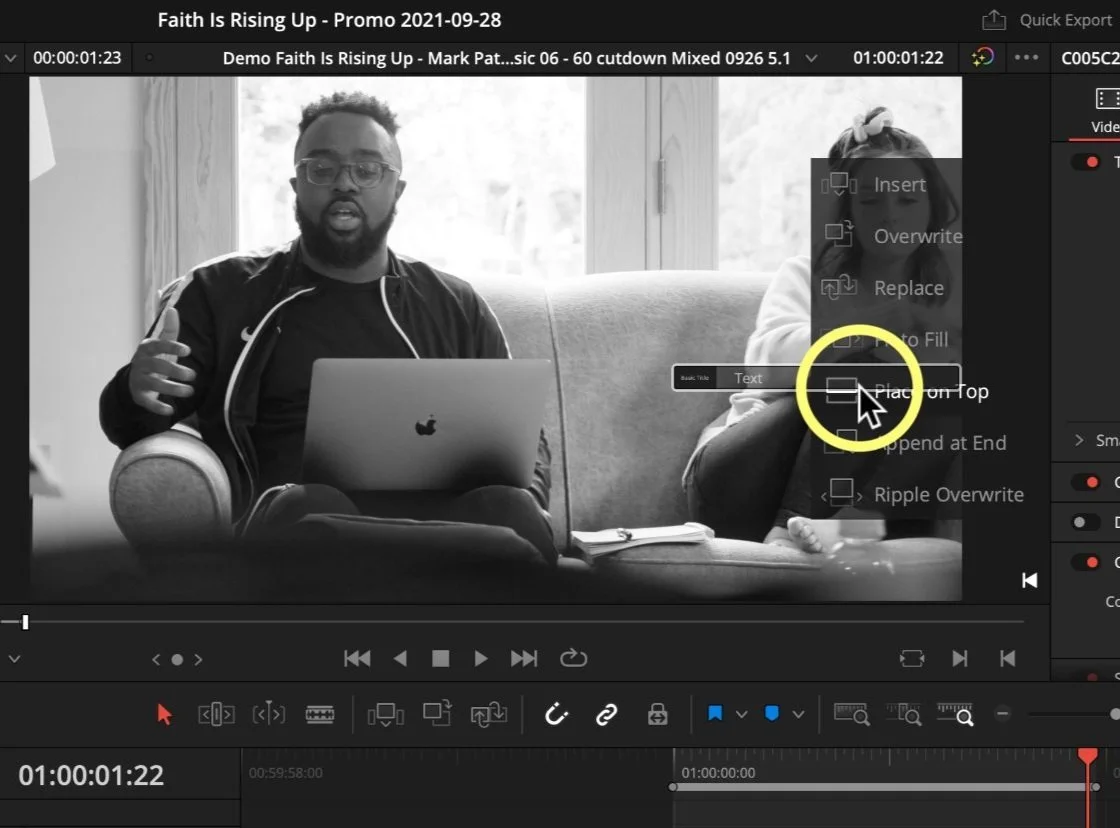
Just make sure you do have an orange destination selected because, for some reason, this is required to edit from the media pool. This is also true for force conforming (another topic for another day).
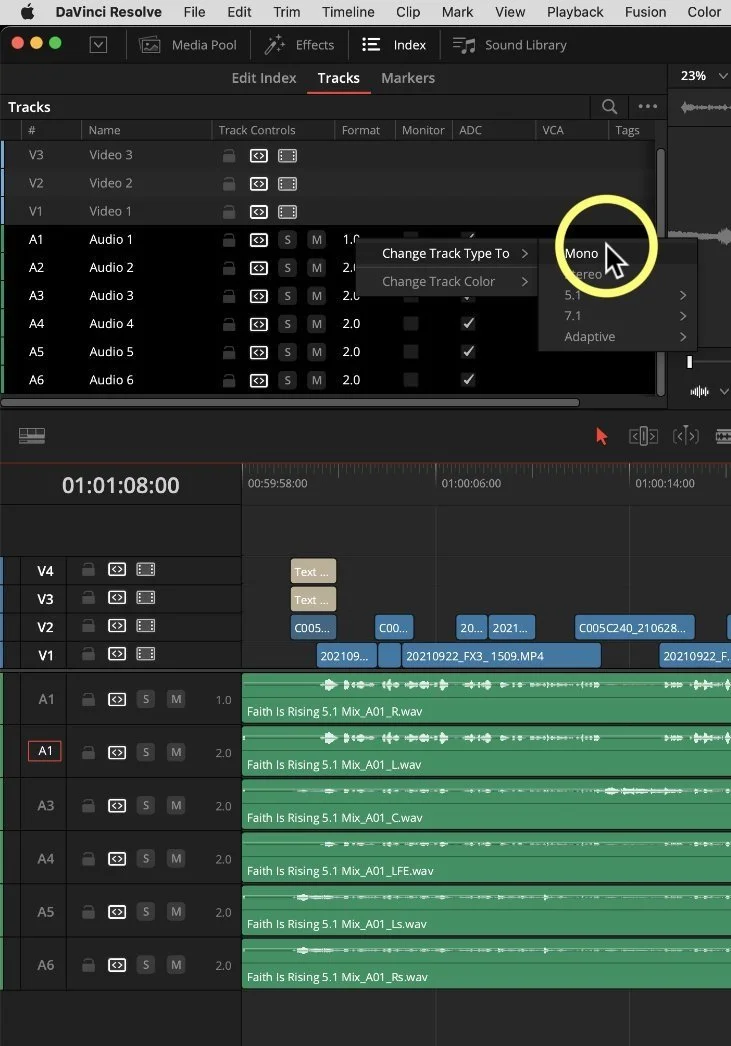
Edit Track Index
The Index panel has several uses, but as a follow-up to the Place On Top tip - IS THIS faster way to fix audio track mapping in the Edit Page.
Ideally, stereo audio gets placed on stereo tracks indicated with a number two for two channels of sound, and Mono audio goes to mono tracks. But we know this isn’t always the case.
Stuff Happens.
And for me, place on top likes to create stereo tracks. So if I’m dropping voice-over or a 5.1 mix down, which is something I do a lot - they are incorrectly assigned stereo. To change this, you would right-click on the tiny 2.0 area and change the track type to mono. You have to do this one at a time. No fun!
A faster way is to open the index and then go to the tracks tab. You can re-order your tracks here, which’re reflected on the timeline. You can also shift select tracks to change them to mono all at once!
See, it’s the little things that make a difference! But now it’s your turn. I want to learn your favorite little DaVinci Resolve tips, and don’t worry, this tutorial is just part one of these little things you need to know. And because there’s so much more to learn. I’ll see you in that next video!