Composite Curved Screens with AI Tracking
Learn how to use DaVinci Resolve Studio 19’s new AI-based intellitrack point tracker with the grid warp tool to REALISTICALLY place any image onto this curved widescreen computer monitor. We’ll convert to linear light space, utilize some fake camera blur, and even whip up a custom edge mask to polish it up. Even if you don’t have curved screens to composite, you can use these skills to fit graphics onto lens-distorted footage. Chapters are marked. The footage is on creativevideotips.com/cuttingclub if you want to join and follow along.
Linear Gamma Setup
Step one to any great composite is to set up a roundtrip linear workflow to make the most realistic-looking composite in DaVinci Resolve Fusion. Media-In nodes have a Gamma option to remove the gamma. Simply check the box and tell Fusion what to source footage is. In this example it’s ITU-Rec709 scene and sRGB. And then, right before sending it back to the timeline, it’s important to add the 709 scene gamma back into the image with a gamut node.
Alternate workflows can use ACES transforms or Resovle CSTs, which are helpful for the growing list of unique camera manufacturers’ log formats and color spaces.
Turning your “view LUT” on with the correct output for your monitor is also essential. For me, that is sRGB for the computer display.
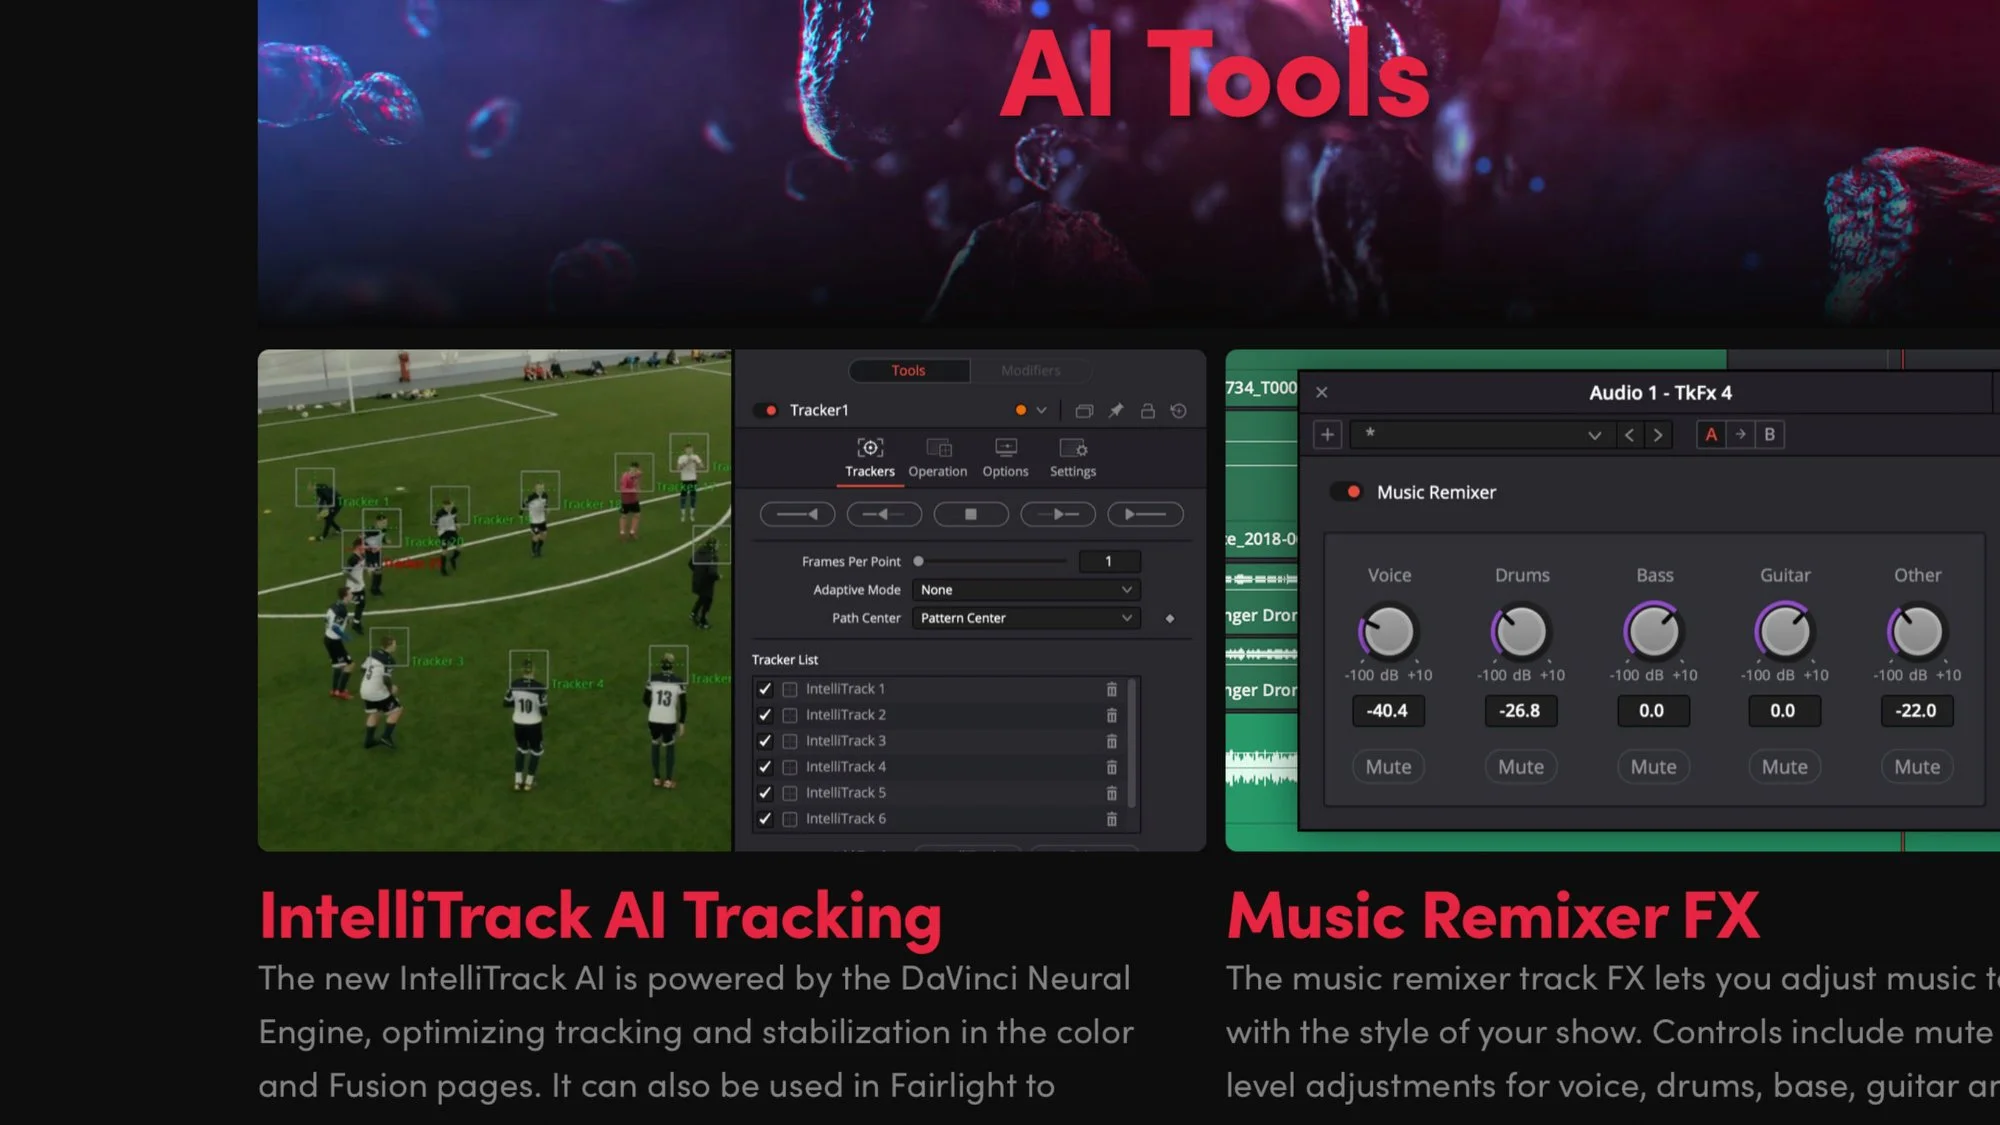
IntelliTrack Coner Pin
In DaVinci Resolve Studio 19, tracking is made more simple with the default IntelliTrack. This supersedes the industry standard pattern-based contrast-detecting tracker that we have used for decades. The advantage to using a point tracker for a corner pin to place a screen into a scene is that you can manually modify specific points and deal with occlusions on the tracking data itself. Planar trackers are amazing, too, but the more tricks you have in your VFX toolkit - the more shots you will be able to solve.
Simply place the boxes with the crosshairs and run the track forward and backward. Change the operation to corner position and feel free to adjust the offsets of the individual points to line up the exact pixels to fit perfectly.
To get only the screen insert as the output of the node, choose FG only for foreground only. This allows the use of the animated alpha channel for adding screen reflections and creating an edge mask.
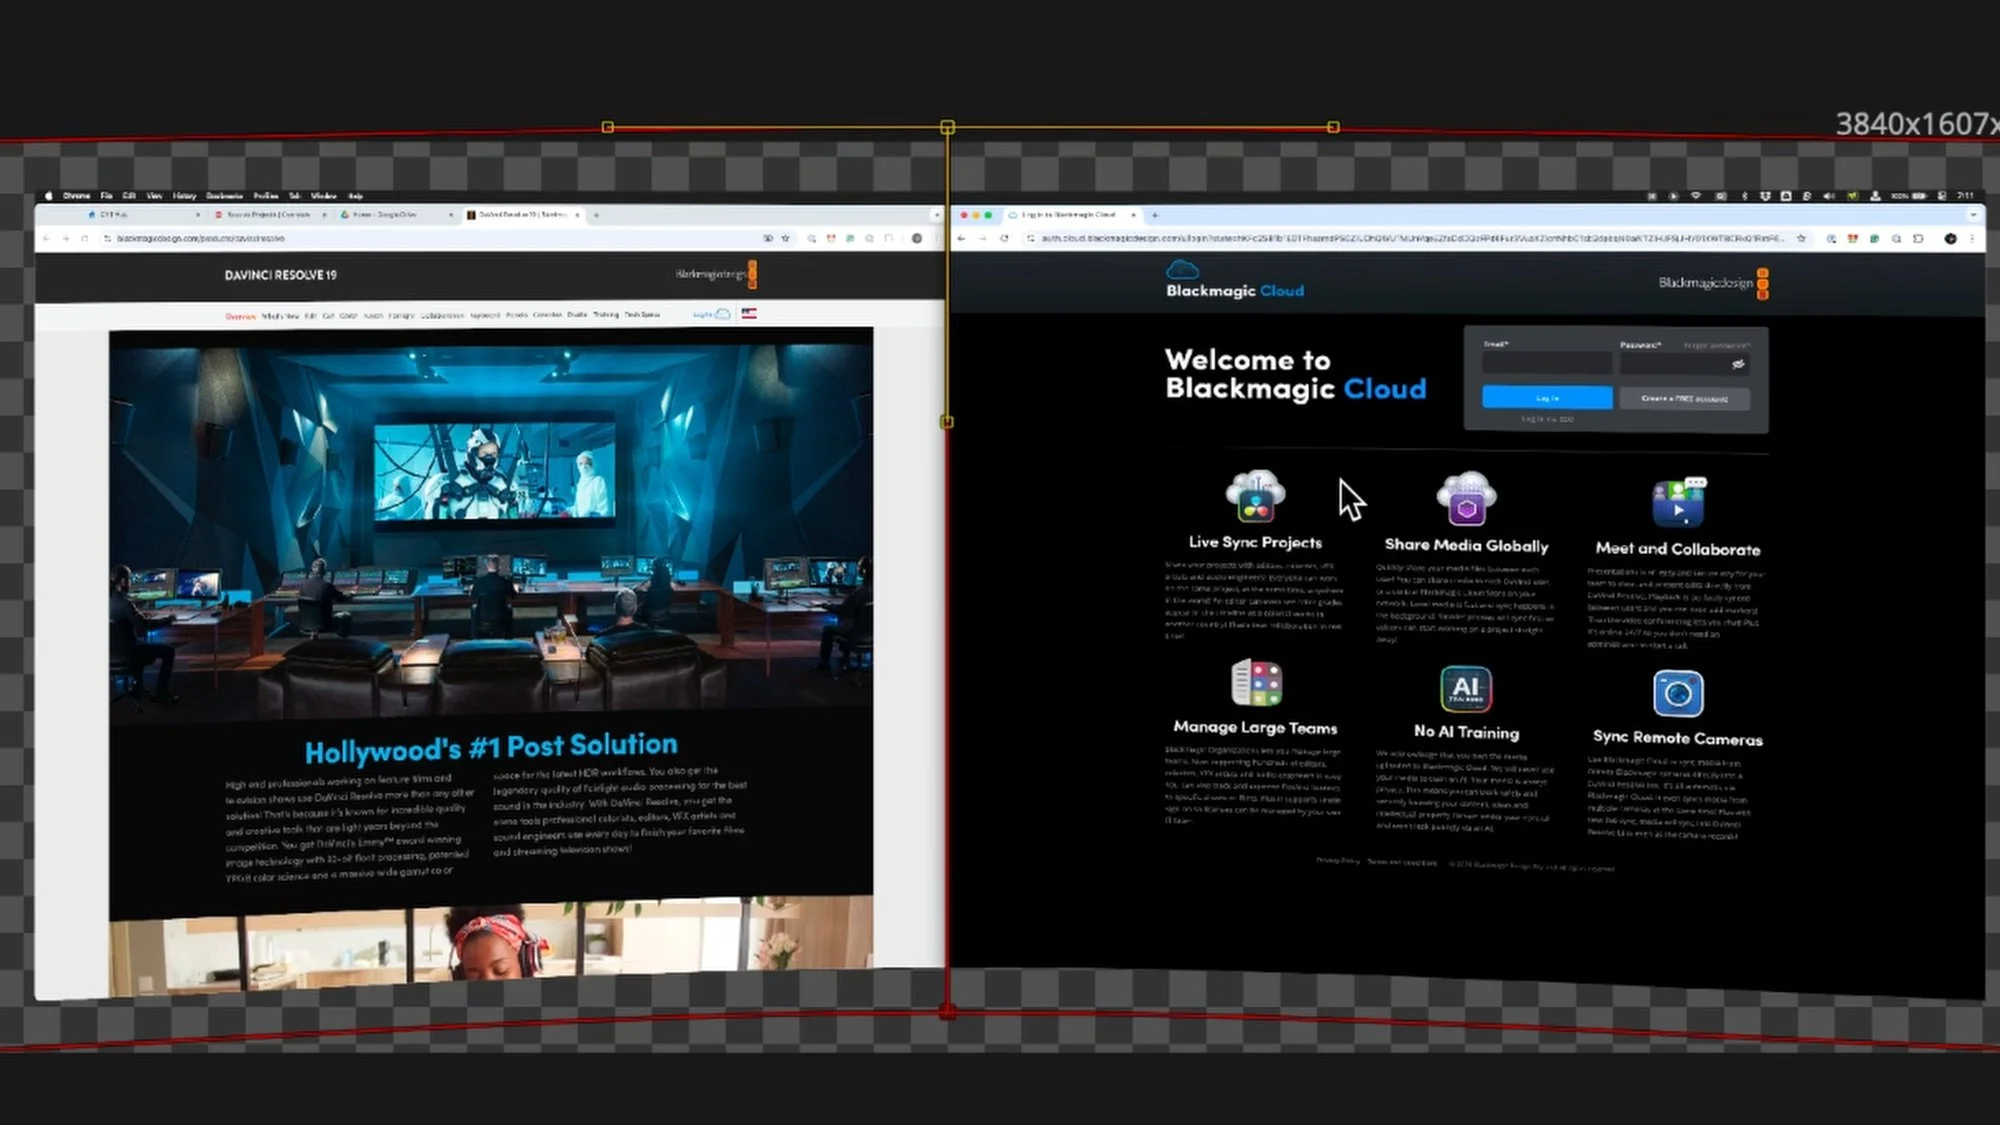
Grid Warp
Grid warp has many uses. Essentially, it maps pixels from a source to a destination based on a grid. So, for this shot, we turn the grid down to a very low number of divisions and copy that to the source. Then, we can select and move the destination points using the arrows on the keyboard to bend the screen insert onto the curved computer monitor. There are tangent handles to get extremely precise.
Channel Booleans Reflection
One principle of linear compositing is that light is always additive. So, if you want to “add” reflections, you can use the channel booleans tool set to add reflections from the original shot back on top of the inserted computer graphic.
This allows the blend slider in the settings tab to be used to control the amount or transparency of reflection that is added.
Downstream of the channel booleans add, clamp the values over 1 and under 0 with a brightness/contrast node.
Then clear out the alpha channel with an Alpha Multiply node.
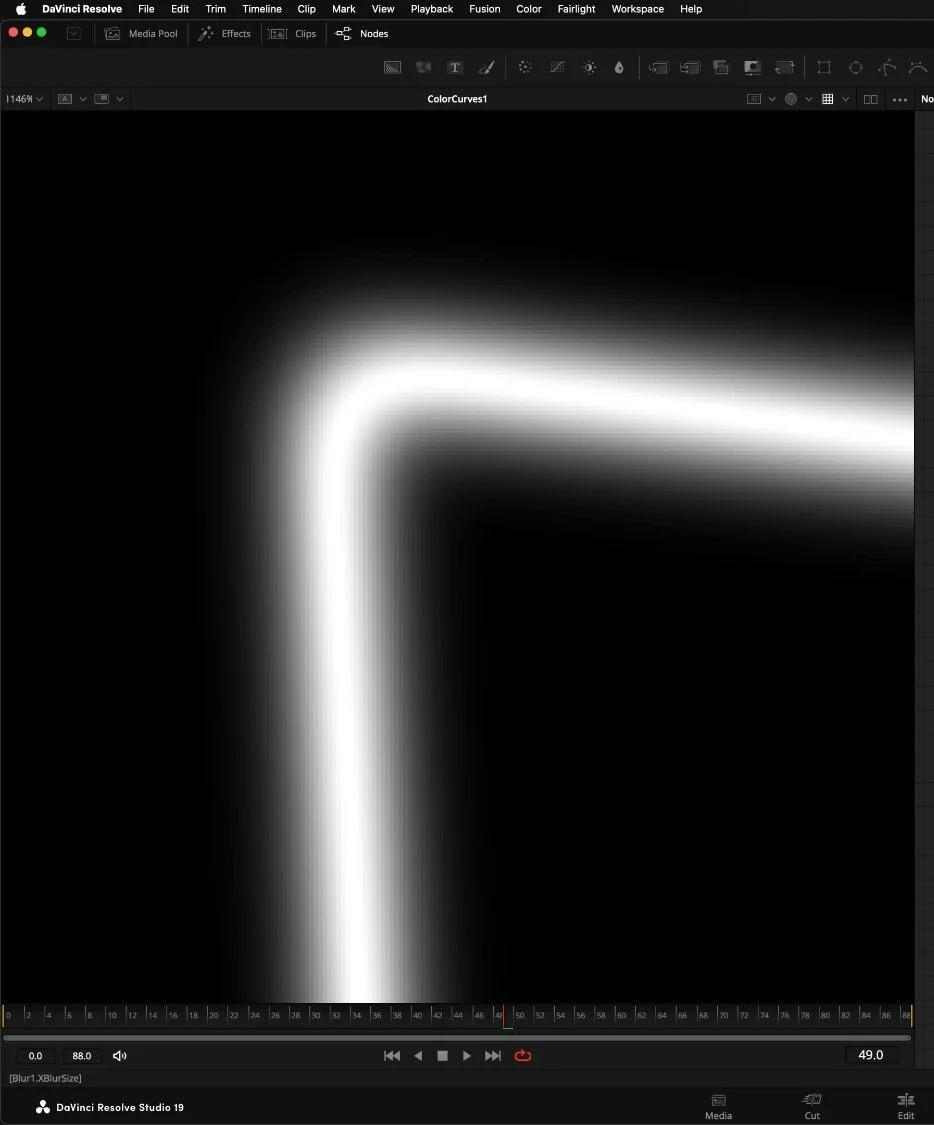
For some final polish, you can create a custom edge mask using a blur tool with a curves tool to blur the result of the comp, but only at the edges. Another polishing step is to create some defocus on the CG with a tilt-shift blur tool.
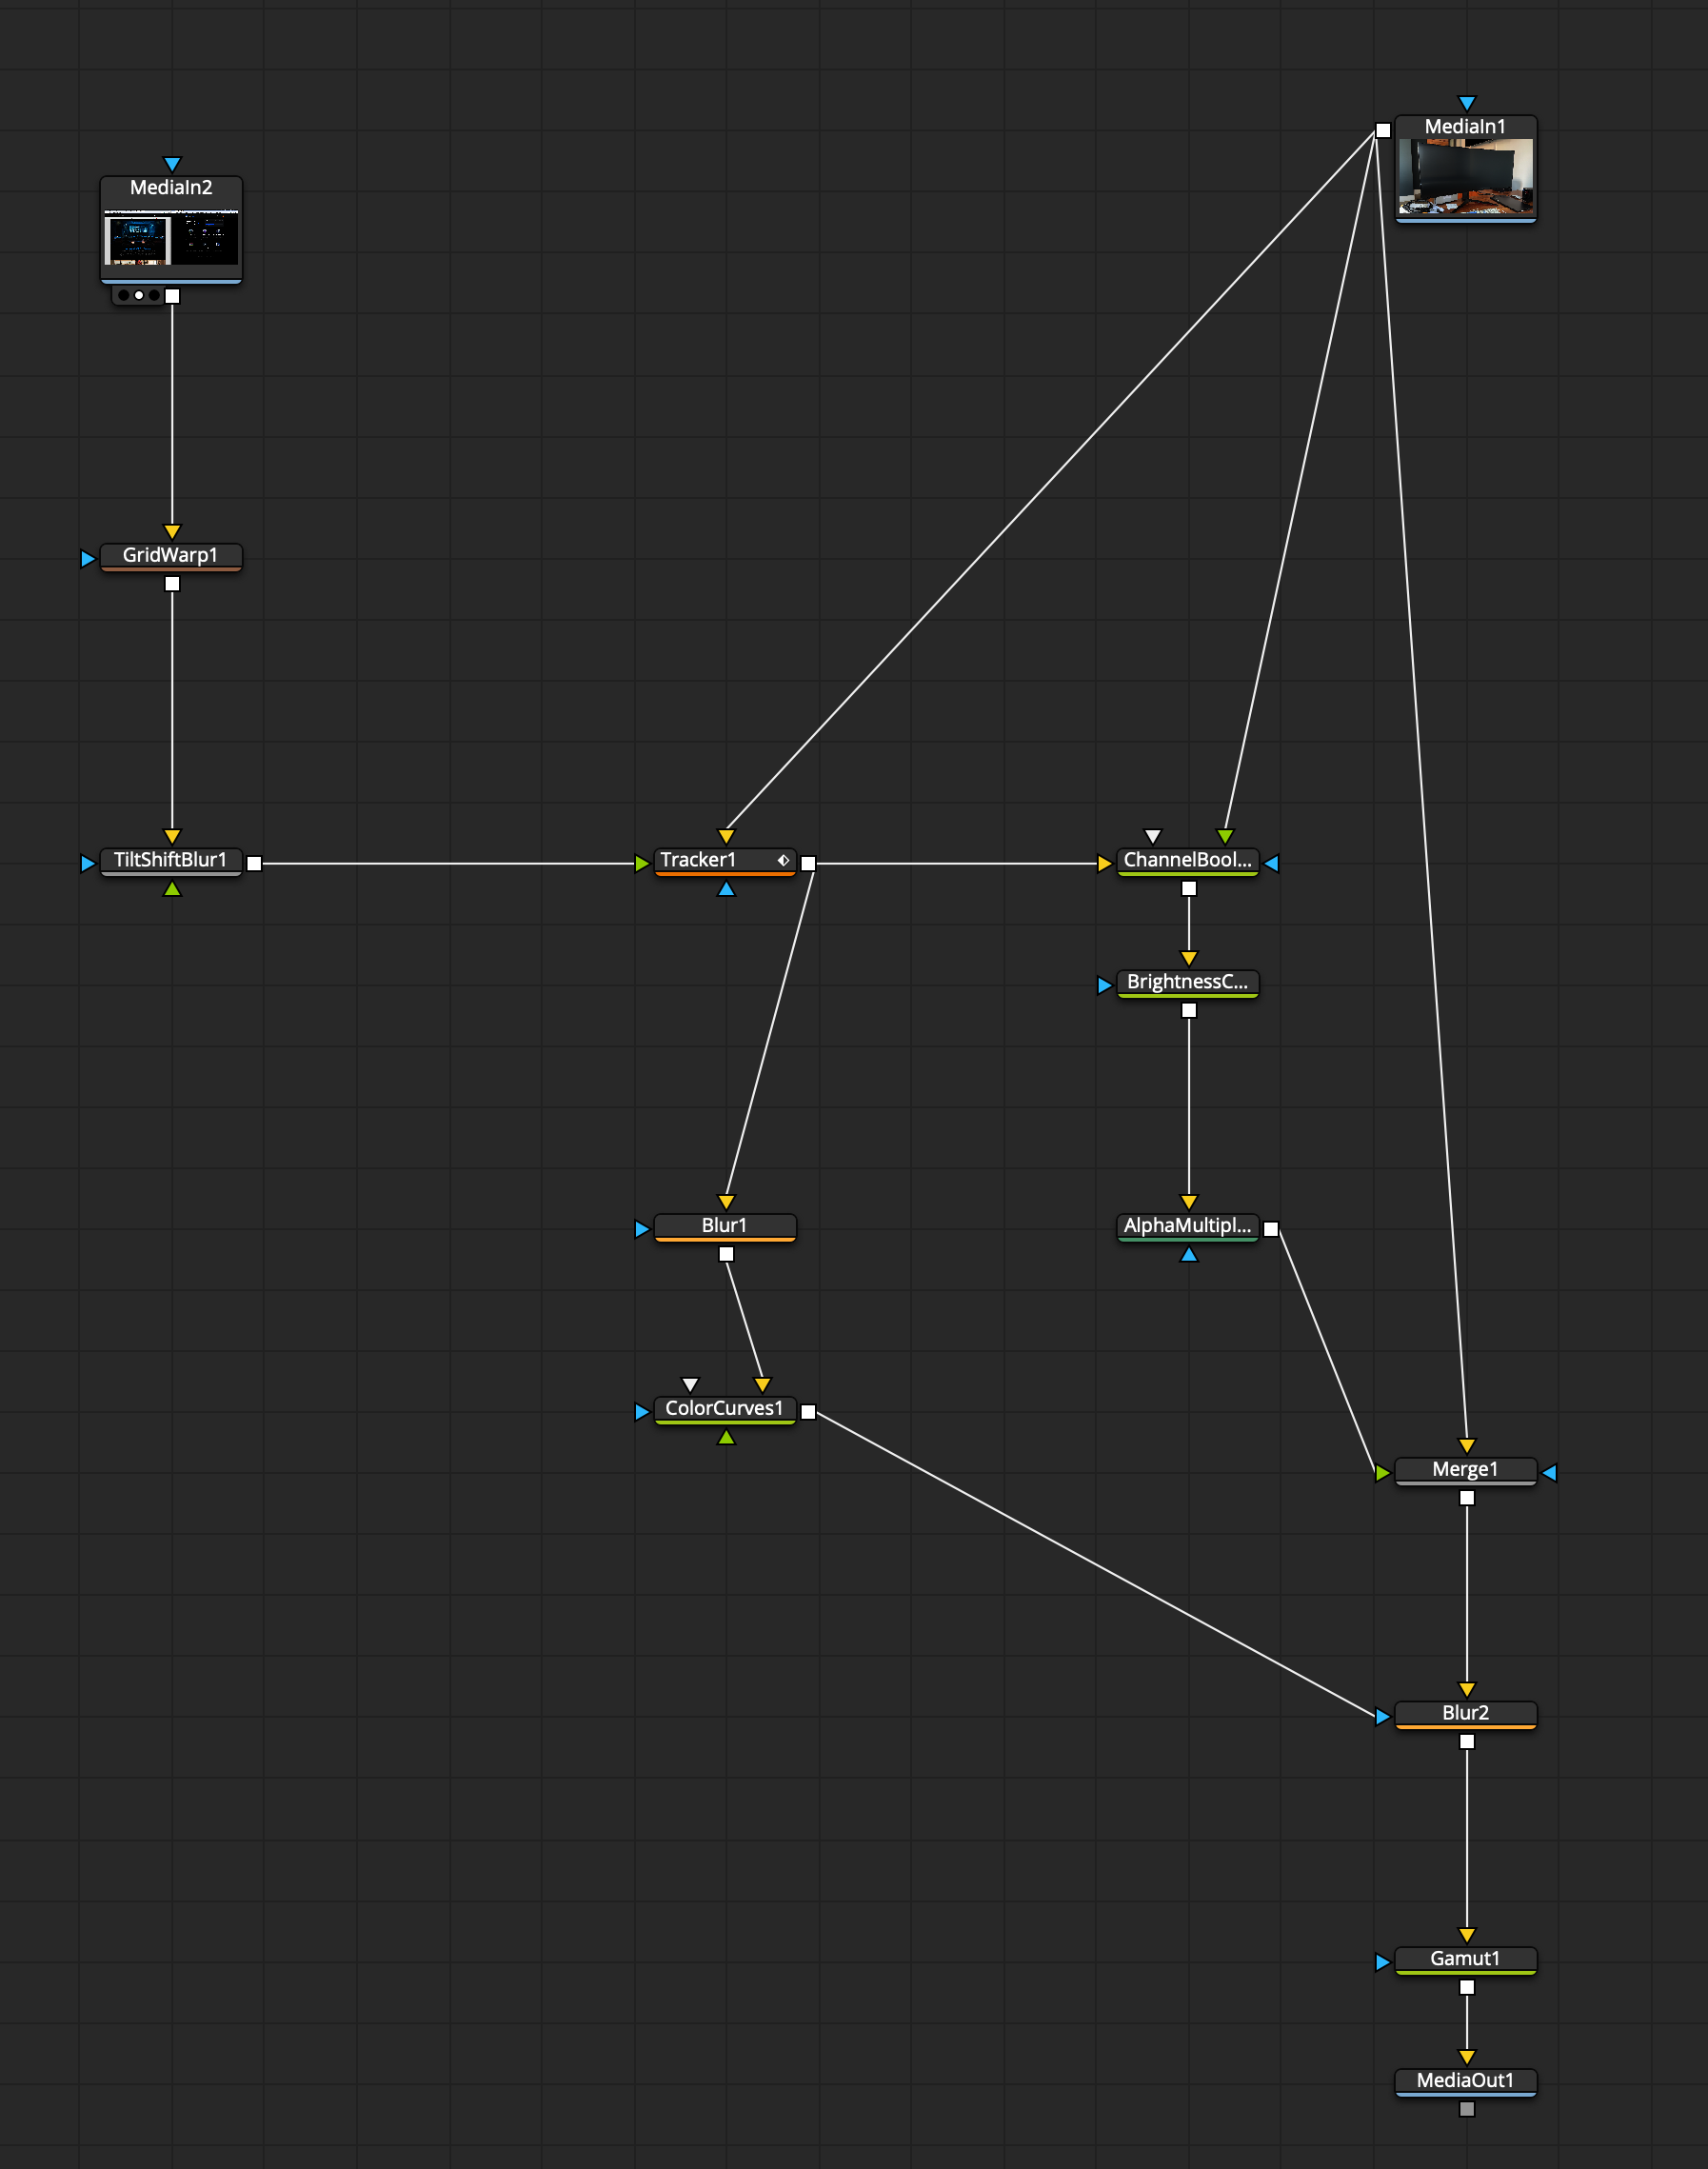
Use all of these with a very subtle, soft touch. A little will go a long way. The final setup is below for future reference.