Export JPGs & Unhide Stills Gallery Frames in DaVinci Resolve
So you need to send a jpeg to a client as a reference, or maybe you want to grab a frame for your youtube thumbnail?
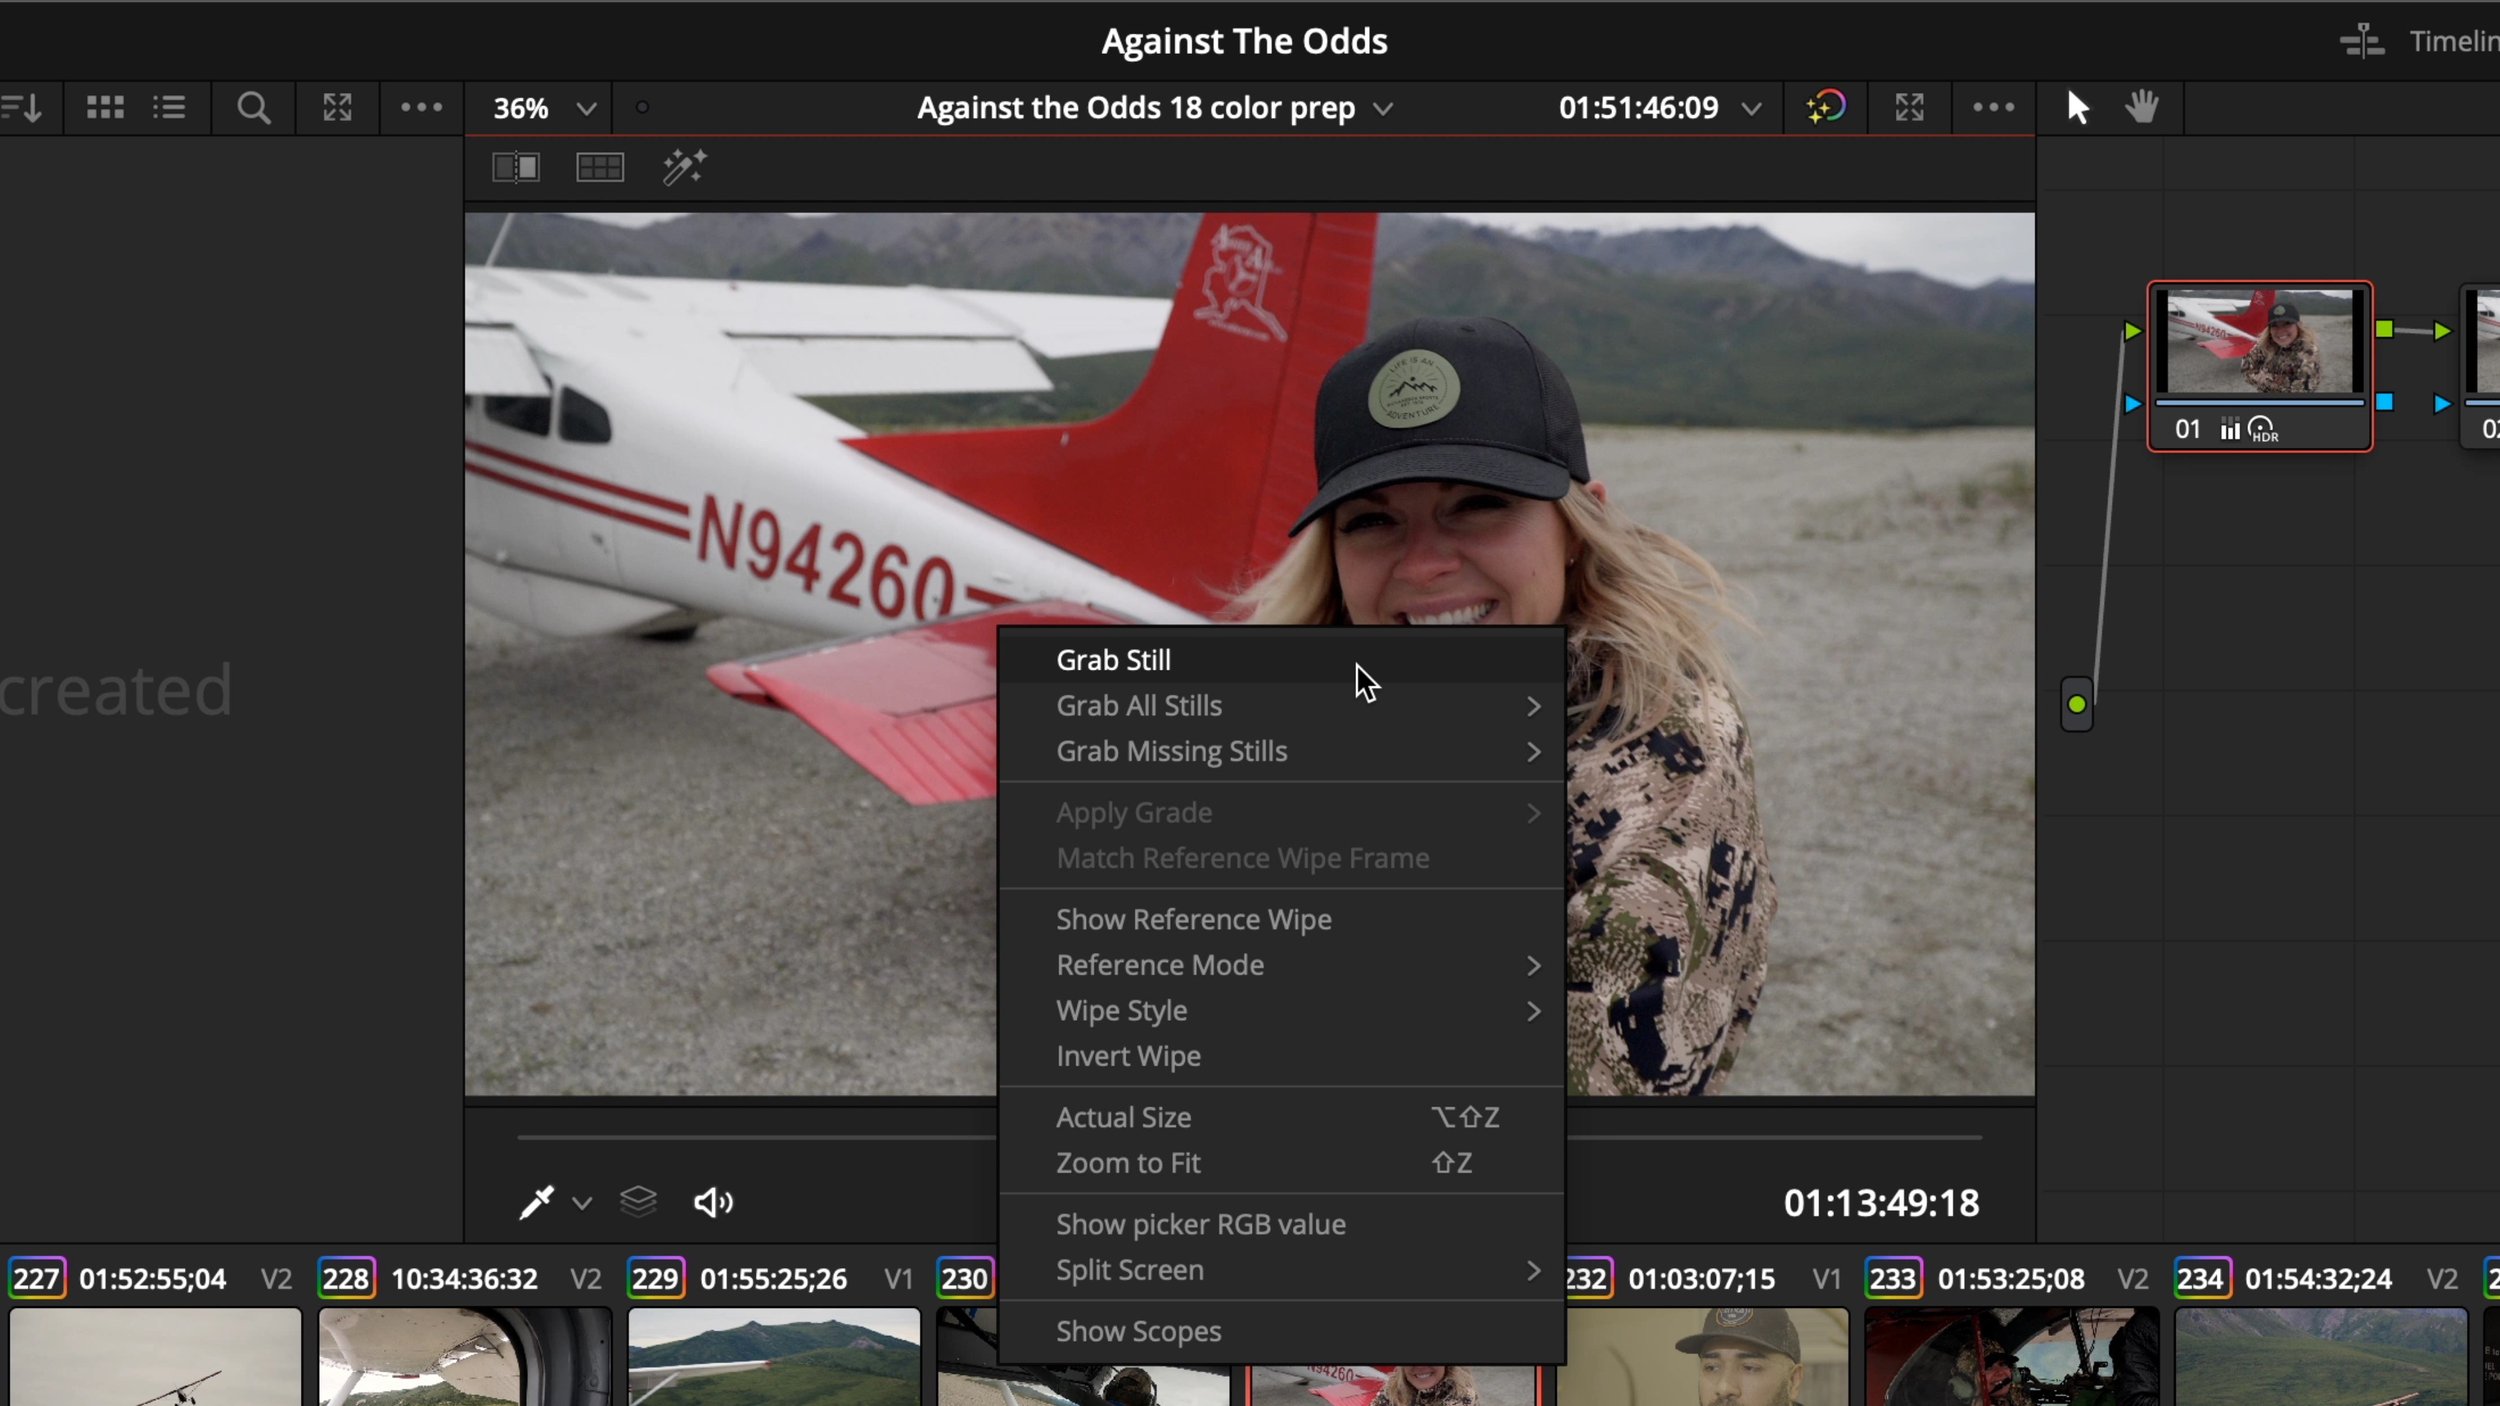
It's not apparent in DaVinci Resolve, but it is as SIMPLE AS right-clicking in the color page to grab a still, then right-clicking to export that jpeg from the stills gallery.
But do you want to understand how to see your hidden stills folder with a keyboard shortcut on a mac?
Or maybe learn a slick new trick to reverse match frame from your stills to your timeline? Then stick around for another minute to go a little deeper.
Scale the Timeline Resolution
The first thing you want to do before creating your still is to open your project settings with the little gear icon in the lower right and check your master settings - timeline settings. Make your timeline resolution match the source video clip resolution to maintain the highest quality.
Sometimes you'll want to edit at 1920x1080, HD resolution, for faster, smoother playback, but then export at 3840x2160 to retain the 4k quality that was shot. So make sure to flip this back to 3840x2160 to get a full UHD still pulled.
While you're in master settings, scroll down to working folders for the project, and you'll see where DaVinci Resolve stores the gallery stills. Mine are set to my documents folder on my mac, and if you click browse, it takes you right to that folder. Resolve saves the stills as DPX files, but you won't see them if you try to find this folder from the finder. That's because it's hidden.
Unhide Hidden Mac Folders
To unhide that folder on a mac, type command, shift, period, and now you can see the hidden folders. It's like a magic trick. If you hit that again, it disappears. I don't dive into there often, but it's essential to understand where Resolve saves them. Oh, And Photoshop can open these dpx files.
By default, the stills gallery will be your first location in your Resolve system preferences for media storage.
How to Export a Frame as a Still Image
Now to pull the still frame, go to the color page. I like to open up the clip's timeline in the upper right and then also open the gallery panel in the upper left.
Click the clip you want to pull a still from and move the playhead to a moment that doesn't have a ton of unwanted motion blur, which is an effect of filming with a 180-degree shutter speed.
Right-click on the viewer itself - and grab still.
Resolve sends that frame to the stills gallery, which includes the image and the node structure. You can see if you display node graph by right-clicking, which is helpful to copy and paste adjustments for other clips.
But for our case, today, click export, name it something logical, pick a safe location on your computer and change the format down below to jpeg.
If you need a lot of stills quickly, you can also grab all the clips' first frames or middle frames with a single click and then batch export them!
Match Reference Wipe Frame
And a sweet quick bonus tip I learned from Darren Mostyn, who has an incredible youtube channel on Davinci Resolve from a Colorist's perspective. You can also use the still to match back down to the timeline. This is similar to performing a reverse match frame for my editor friends out there.
Just right-click the still, and choose match reference wipe frame. This one has been super cool and new to me in the past year.


