
Avoid Gamma Shift from DaVinci Resolve to YouTube
For too long, I exported washed-out, low-saturated videos for YouTube compared to what I color graded in DaVinci Resolve, but I want and need them to be the same - so I learned how to fix it on my Mac and want to share that with you right away.
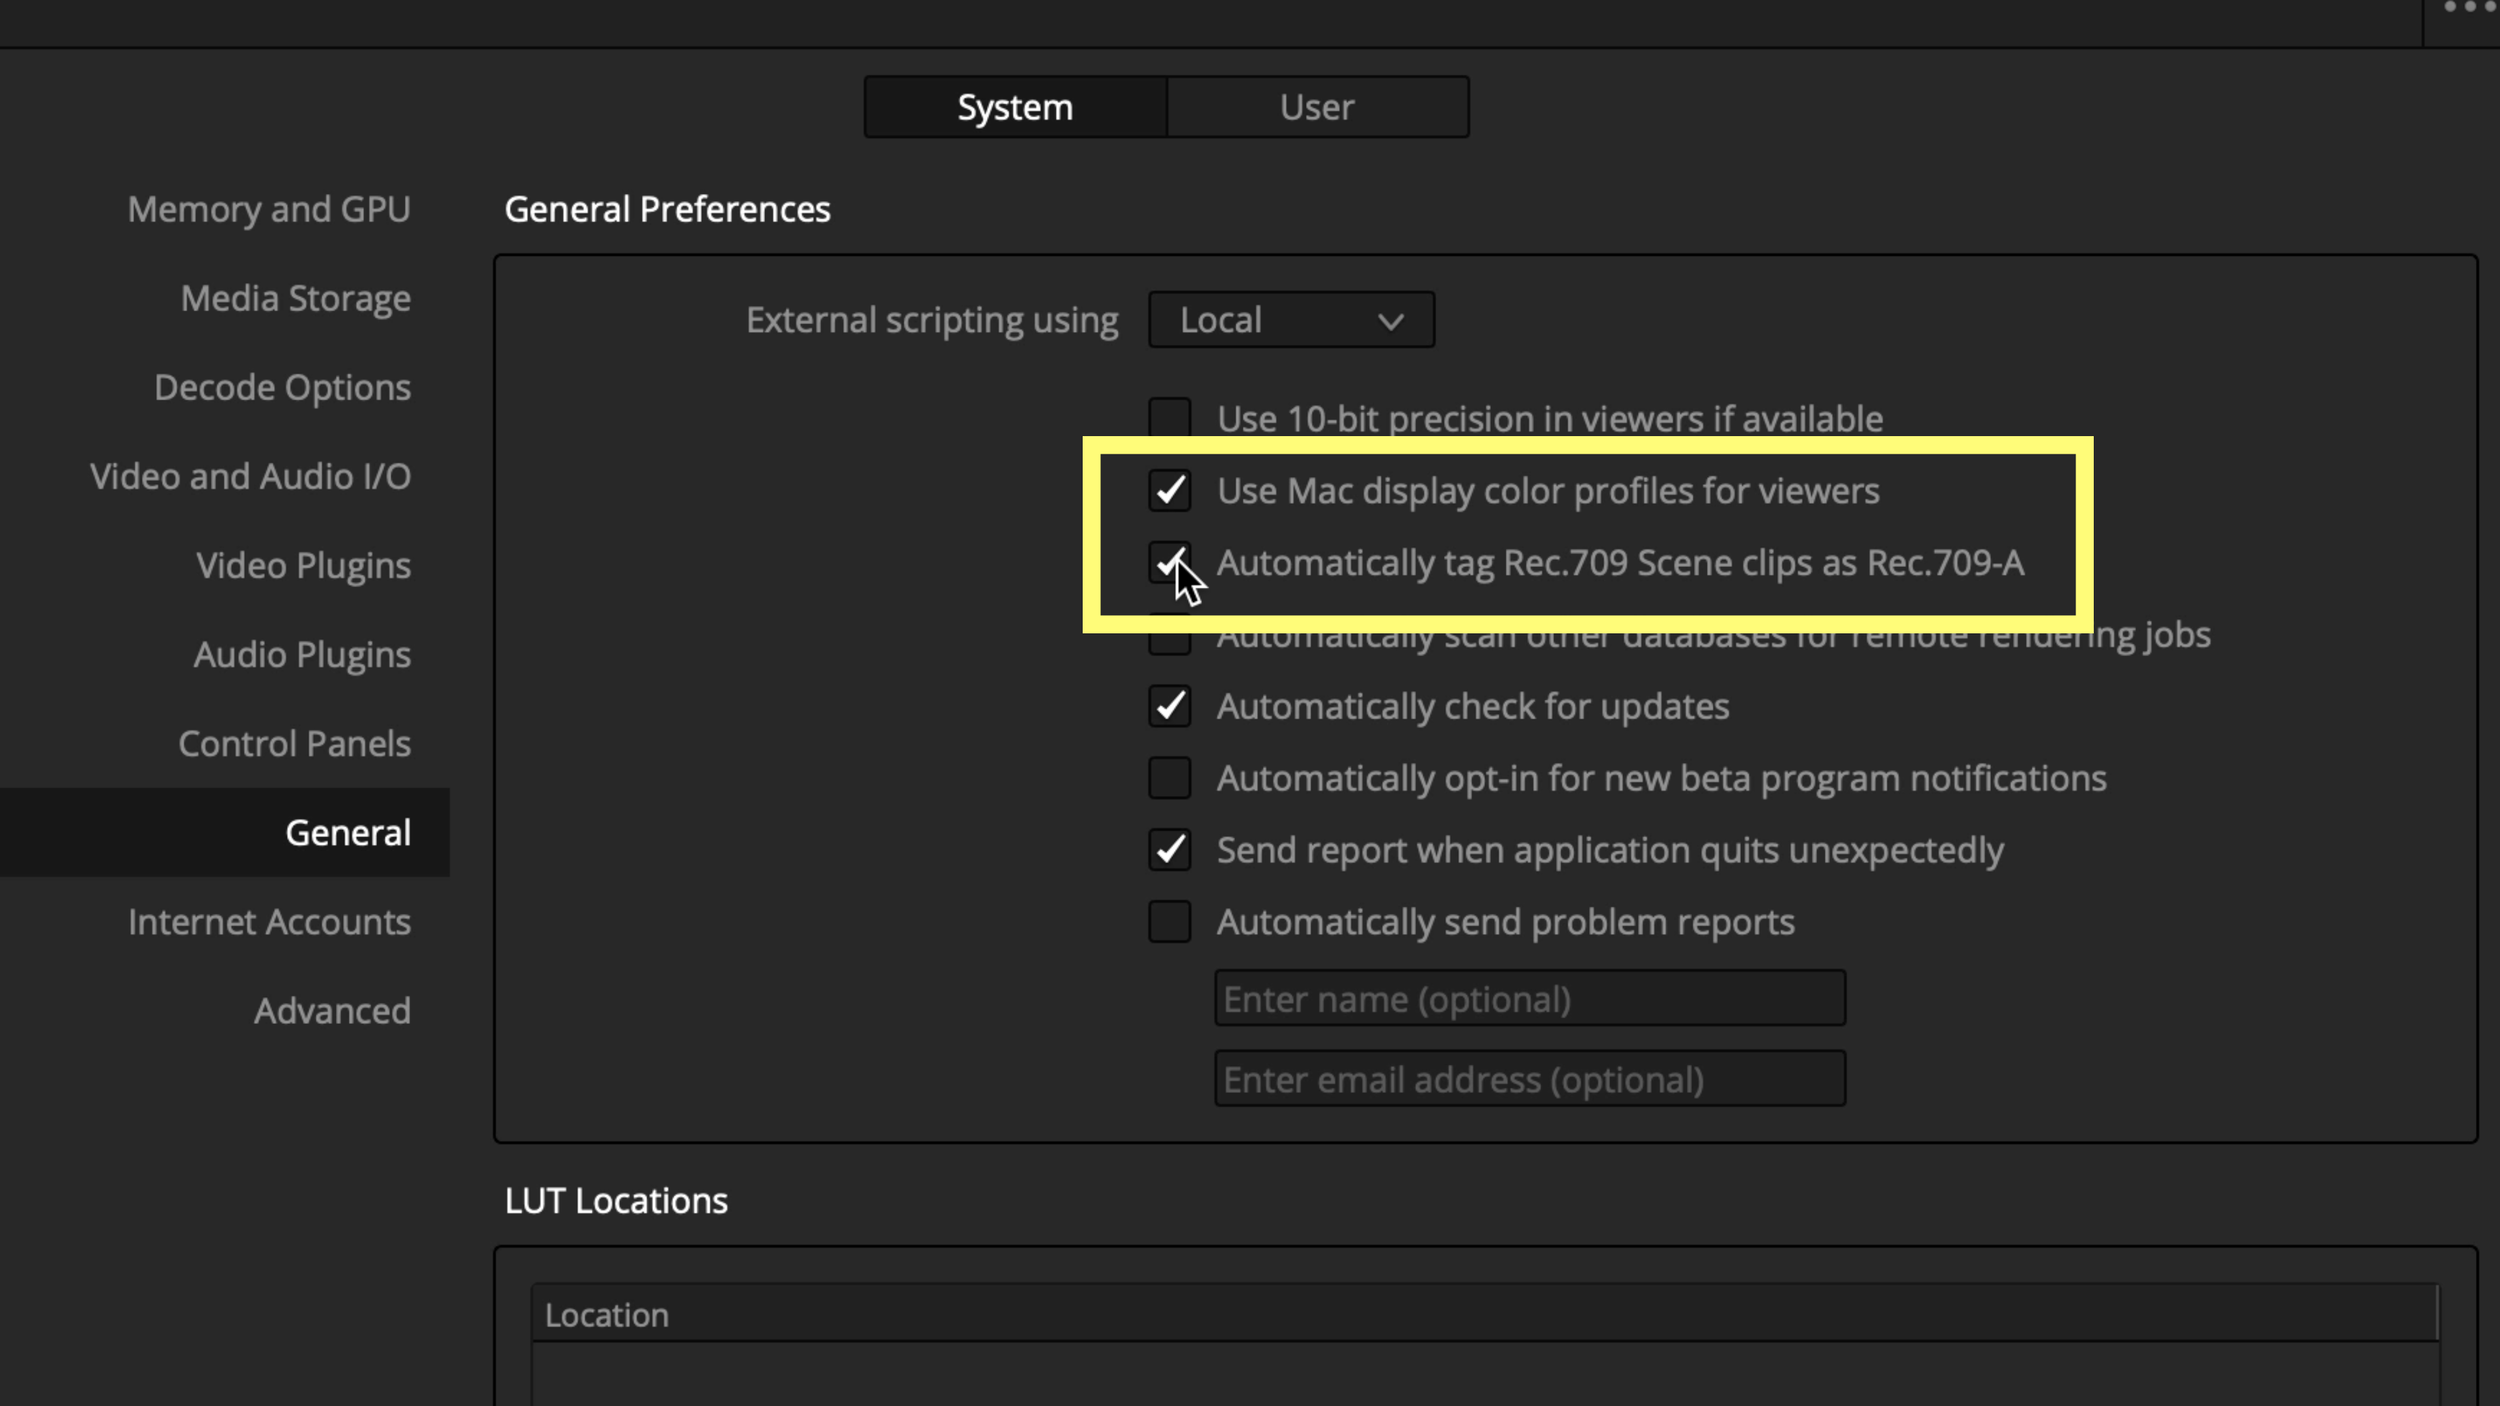
The quick tip is to open preferences. Under system settings, go down to general. Check the two boxes for "use Mac display color profiles for viewers" and "automatically tag Rec.709 Scene clips as Rec.709-A. Then restart Resolve so those settings will lock-in.
Now open project settings. Go to color management and change the timeline color space to Rec.709-A. Just save it, grade it, and do a quick export to h.265 for uploading to YouTube and it will match the work you were viewing on your computer monitor in Resolve.

But if you want to know THE ABSOLUTE BEST settings for uploading for youtube, especially if you don't use a specialty calibrated color reference display or work with flat log or raw footage. Read till the end, and I'll show you what works best on a Mac.
The NCLC Tag Problem
I hear editors complain about the QuickTime gamma shift all the time and know what they mean, but it's just a file using incorrect NCLC tags, which you can see in a QuickTime inspector where they call them code points. These tags are just information about the video file to tell Color Sync, which is the Mac's color management system that works in QuickTime, preview, safari, and chrome, how colors should appear.

YouTube wants and expects to see the tags set to 1-1-1, and the problem is that most people color grade in the broadcast default gamma 2.4, which will export a 1-2-1 tagged file that will give you a washed out, low contrast saturated video once YouTube converts it. So on a mac, Rec.709-A will provide you with the best looking and consistent images from Resolve to QuickTime to YouTube.
Color Managed Exports
I assume you already set your Resolve preferences to use Mac display color profiles for viewers and tag 709 clips as Rec.709-A from the intro part of this tutorial.
However, instead of working with YRGB color science, let's open project settings and go to color management to work in DaVinci YRGB Color Managed. Resolve Color Management is an amazing under the hood way to get your footage looking beautiful, especially if it's log encoded or raw footage, without needing to do much normalization correction at all.
I like to disable automatic color management and change the color processing mode to HDR DaVinci Wide Gamut. Wide Gamut lets me use the HDR grading tools, so they behave just like a camera does for things like exposure, color temperature, and saturation.
And then this is the critical one, change the output color space to Rec.709-A and save it.
Next, assign input color spaces to any log encoded Clips that aren't raw - I've got a link in the description to learn how simple and powerful color management inside of Resolve is if that's new to you.

Edit, Grade it, and change your timeline resolution in the project settings to 3840x2160. YouTube uses two different codecs, and the 4k resolution will force it to use the better codec called VP9 once YouTube re-encodes the file.
Now click on the deliver page and choose H.265 master if you have a newer Mac, H.264 if it's older; otherwise, it will take ages to render the export. I like to use QuickTime as the format and check the box for chapter markers to navigate chapters in QuickTime player.
To bump the quality up slightly, I like to change the data rate from automatic to 50,000 Kilobits per second. Click the file tab to force your export video name to match the timeline name inside of Resolve. Add to render Queue, Render, and Upload to YouTube.
